Showing posts with label Blue Fern chipboard. Show all posts

Wednesday, 7 November 2018

Metals and Petals with Helen

Welcome back to the Scrap Matrix challenge this month 
where we have a unique mood board to inspire you;
it's all about petals and metals.


I've been waiting for the right challenge to scrap this photo of my Father harvesting in the mid North of South Australia.


 This paper from Stamperia, "Clockwise" seemed perfect for the photo.

I decided to team it with a piece of chipboard from 
Blue Fern Studios, "Techno Scape"

Getting the rusty look I was after proved to be a bit time consuming, but it was worth the effort, as I love the result.


This chipboard was raw, so I painted it with white Gesso to seal it.


The first layer of paint after the Gesso was Ranger patina "Moss".


The second layer was a mixture Ranger Patina "Jade" and "Verdigris".


Next came a layer of Prima Rust Paste, "Red Rust". 


Then a layer of Prima Rust Paste, "Gold Rust". 


Ad finally a layer of Prima Rust Paste, "Brown Rust". 

Pheew!  Well may you say, what a load of Bull Rust, but thanks for sticking with me so far, as I have a few close ups to show you.


The metal clock reminds me of my Father's watch face which he protected with a leather cover.  
There is a similar one at the Scrap Matrix shop Here.
I've stencilled a few flowers here.


This stenciling reminds me of the curves and circles left by the machinery, as Dad drove around trees and the uneven terrain.
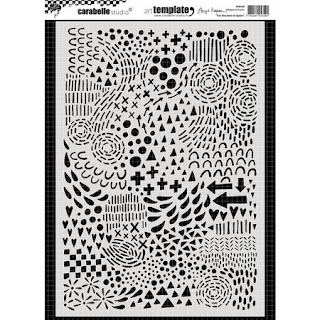


This stencil is super versatile, as I plan to use the whole thing as a background. However for this project, I simply masked off the parts I wanted to use.  It looks a mess with all the ripped post its stuck down, but it allows me to get a crisp result of a particular area. 


No page about a Farmer would be complete without a bit of string!


 A closer look at some of the metal flowers.
Vicki has heaps of metal flowers in her shop Here


I hope you find time to play along this month.  

How about using waxes to simulate metal?  What about an off the page project with some oversize flowers that could be painted a metal colour. You might have an embossing folder or a die which has a metal look.  There's lots of ways you can create a project.


Just add your entry to the Scrap Matrix Shares page in the corresponding folder and don't forget to let us know what Scrap Matrix products you used and what inspired you.  You could be in the running for a $30.00 gift voucher and perhaps a Guest Design Team spot down the track.


Scrap Matrix Products used:-

Stamperia Papers, "Clockwise", on back order.
Prima Rust Paste
Ranger Patina, Moss, Jade, Verdigris
Blue Fern Chipboard, "Techno Shape"

Friday, 26 October 2018

Monique's "Family Memories" Layout

Hi Everyone,

Monique here, popping in to share my second layout for this month's "You've Got Mail" challenge.
This time I went back to my old shabby chic/vintage style and used some of the gorgeous papers from this beautiful paper pad by Stamparia.  It has such gorgeous images of postcards, stamps and postmarks - how could I resist?


Here is my layout:

I just loved layering up all the papers to create depth and texture, as well as glimpses of all the "mail" ephemera.

Here are some close ups:


Here is a full list of all the products I used from the fabulous Scrap Matrix Shop:


Thank you for popping by the blog today, I hope I have inspired you to enter our fabulous challenge.  You still have a few more days - simply upload your entry into the "You've Got Mail" Album on the Scrap Matrix Shares Page.

Take care and Happy Scrapping!


Thursday, 20 September 2018

You've been framed. A second post from Helen

Welcome back to the Scrap Matrix challenge where this month we are asking you to use frames on your project. You can make a layout, an art journal page or a card.

They can be any type of frames; big, small, square, round, anything you like.   Why not pop over to see what the rest of the team have created to inspire you?


The subject on my page is my darling Grand daughter, who was recently diagnosed with some visual problems and now needs to wear glasses.
The frames of her specs sparked the idea for my layout.

I chose to blur one of the photos to demonstrate how she 
used to see the world before she got her specs. She took to them like a duck to water; her spelling and reading improved almost immediately and she wears her purple frames with pride.

Recently, I was lucky enough to take some classes with Tracy Scott and I've used  her techniques to make the flowers.

It was wonderful to gather with scrappy friends, to laugh, learn and get really messy. I caught up with some of the Design Team, met old friends and made new ones, all in a fun atmosphere.  Thanks so much Vicki Christensen for organizing such a brilliant event.


I covered the paper with a layer of Dina Wakley clear gesso 
as I planned to use mixed media on the page.

The glasses frames are from a cut file by Silhouette.


To add some texture, I scraped some Finnabair modeling paste 
through a stencil from AALL & Create, #13


The purple splashes were made with Tim Holtz Distress Oxides, Wilted Violet; I love how versatile this product is; 
I seem to use it on everything.


The next step was to finger paint a piece of white card stock with Paper Artsy Chalk Inks - Bougainvillea, Caribbean Sea, Banana, Limelight, Lavender.  Then I dried it off with a heat tool. This finger painting was a technique that we did with Tracy... 


Now comes the fun part!   
I chose lots of flower stamps and filled up the entire page using Black Ink.  I used Tim Holtz Archival, Jet Black before drying the card stock again with a heat tool.

The stamps are all from Paper Artsy; ETS21, ETS18, ETS16, ETS06.
I love them all and there are so many more that I need like!

After the classes on the weekend, some of the stamps have sold out, but they are on order again, so it won't be long until they are back in stock.


Next I flicked on lots of splats with Paper Artsy Gold paint. Tracey said the more the merrier.  I ended up with gold everywhere, even on my glasses!  Next time, I'll take it outside.

The final step is to fussy cut the images; something relaxing to do in front of the TV while someone else does the dishes!


To ensure the stamping and splats were completely dry, I went on with prepping the chipboard with white gesso. It's called Blue Fern Stars.  I noticed that firm is closing down, so if you love these chippies; it's time to stock up.

Whoops!  I forgot to photograph the painted stars.  I just mixed some Tim Holtz Distress Oxides, Seedless Preserves and Salty Ocean, to get the pink colour I wanted. You can see them in the next photo.


Just playing around with placement, to emphasize the world in colour and in focus, that is now part of my DGD's life.


Finally I added a few bits of black stamping here and there.
I used  AALL & Create #23, (temporarily out of stock) and 
some oldies from my stash.

Phewh!  Congrats if you read all the way to the end, 
it's a bit of a marathon post.

Thanks for calling in today, I hope you find time to play along, 
just add your entry to the Scrap Matrix Shares page in the corresponding folder; don't forget to let us know what Scrap Matrix products you used and what inspired you.  You could be in the running for a $30.00 gift voucher from the generous Vicki Christensen and perhaps a Guest Design Team spot down the track.

Monday, 17 September 2018

Cheers by Sandra Brimelow

Hi everyone, I am back with my second layout for September as a guest designer for Scrap Matrix, for the frames challenge. Here is the graphic for the challenge:
I love how versatile this challenge is, so many different ways to use frames.
Cheers

This layout, had me go in a slightly different direction. I decided to cut a frame using one of my papers from the 13 Arts - Art Journey range - Creativity and Travel papers, which I used as a surrounding frame for the layout. 
Using the Tim Holtz distress oxides - Walnut stain, I added some depth to the papers, and also edged the frame.
To the backround I also spattered some Lindy's Stampgang Starburst spray - bodacious blush. 
A bit of stamping also added to the background using Ranger archival ink - jet black and Aall and Create stamp set #10, and Blue Fern Studio stamp set - texture circles.
To finish the background, I used Aall and Create stencil #10, and texture paste. I also spattered the background using Irresistible spray - wedding dress.
To embellish, I stamped some images using Aall and Create stamp set #11 and #44 and Tim Holtz distress oxides - walnut stain and tattered rose. I also added a little wood veneer frame to my cluster. The Tim Holtz Idealogy small talk stickers were also nifty little additions on the layout. 
To finish the layout, I embellished using Blue Fern Studio flowers - late winter lillies.
Thanks again Vicki and Scrap Matrix team and followers for having me as guest designer this month, I have enjoyed this opportunity. 


Wednesday, 5 September 2018

Monique's First "Framed" layout.

Good morning everyone!!  Welcome to the Scrap Matrix Blog - how are you all going with the "You've been Framed" challenge?

It's my turn today to show my first layout for the challenge, and here it is:

What I love about this challenge is it is open to so many interpretations. You can make your own frame, use chipboard frames, polaroid frames, frame the page, paint frames...... you could just let your imagination go wild!

 On this layout, I decided to create my own frame using ephemera from the Pink Fresh "Boys Fort" Ephemera Pack.

I actually had lots of painty fun with this layout.  First, I covered my page in some TSW Clear Gesso
Then I took out my Dina Wakley Heavy Body Acrylic paint.  Next, I used AALL & Create Stencil #20 to add some texture paste to my base.  Then, I added my paint with a palette knife.   I wanted to use a yellow shade that closely matched the yellow in the ephemera I was using.  The thing I love about this paint is it is so easy to mix and blend to create the exact shade you desire.

This time I used "Lemon," "Tangerine" and "Olive" the create the shade I wanted.


Once all that was dry, I used this Paper Artsy Stencil to stencil on some arrows using Dina Wakley Heavy Body Acrylic Paint in "Night"

Here is a picture of my base:


Next, I cut out a piece of paper about 2.5 centimetres bigger than my photo in width and height, and played around awhile with the ephemera until I was happy with how my frame looked.  When I was satisfied, I stuck it all down, and then added my photo on top, popping it up on some thick card to give it more dimension.


I adhered my photo to my base, then added some more KK Chipboard - "Squared 6" and "Bite Sized," which I painted in Dina Wakley Heavy Bodied Acrylic Paint in Elephant.  My title word "Journey" is also painted in Dina Wakley Heavy Bodied Acrylic Paint, this time in "Night."


Here is a photo of my finished layout:

Thank you so much for popping by, I hope you have found some inspiration to crack open your ephemera packs and use them to create a frame for your photos!


Here is a full list of the products I have used that are available in the Scrap Matrix Shop"

Pink Fresh Studio "Boys Fort" papers "High Five" and "Wowsers"

Don't forget this challenge is open until 30 September - if you want to play along, simply upload your "You've Been Framed" layout to the relevant folder on the Scrap Matrix Shares Facebook page - I am so looking forward to seeing all your sensational entries!

Bye for now.


Saturday, 18 August 2018

Beautiful Girls

Hello everyone,  Monique here with my second AALL & Create challenge layout.  This time, as well as doing a bit of stencil work, I also used the really cool Stamp Set #35.

I couldn't resist the cute little parrot in a tutu and just had to use it as an embellishment on my layout. With that in mind, I chose to do a bright, fun layout about my two beautiful nieces.

I started by creating my background.  I decided to break out the gorgeous Prima Watercolour Confections set in  Odysee and use the Amsterdam and Tokyo colours.  I started with the Tokyo hot pink, and brushed it on to my cardstock base, spraying it with water to spread it around, then drying it with my heat tool.  I then applied the Amsterdam purple the same way.


Once both layers were dry  I tore some large hearts from the Dina Wakley collage tissue paper and adhered them onto the background with some Liquitex Acrylic Fluid Matte Medium.  I then stamped some of the small hearts from the AALL & Create Stamp Set #35.


Next, I used an AALL & Create Stencil #16 to pop on some white texture paste.


I then made a photo mat with some 7 Dots Paint Chips Razzleberry Paper and Tags.


 I then adhered my photo to the photo mat and popped it on my layout using some thick card to give it some dimension.


I then added all my embellishments.  First of all, I stamped that cute little parrot stamp from the AALL & Create Stamp Set #35 - using archival ink.  I then used the Prima Watercolour Confections Odyssey set to add some colour.  This time I chose to use the Jamaica colour primarily, and accents of Tokyo and Dubai.
Next, I painted the Blue Fern Studio Eclectic Hearts in Dylusions Crushed Grape, and arranged them as accents around the photo with the parrot, some Paint Chips Die Cut Elements, some Dina Wakley Media Tape and some Mambi Chips, the ones I used aren't there, but there are just sooooooo many to choose from!

Whenever I add embellishments to my layout, I always make sure I arrange them so that they drew attention to my photo.  One way to do this is to create an imaginary triangle with the photo placed within it.

Here are some close ups:


Here are the links to the products I've used that can be found in the Scrap Matrix Shop


Thank you for popping by the blog today, I hope you have been inspired to break out your AALL&Create Stamps and Stencils today.  It isn't too late to enter our fabulous challenge, all you have to do is create something using AALL and Create products, then upload it into the "AALL&Create" folder on the Scrap Matrix Shares Facebook page.  Don't forget to mention the products from the Scrap Matrix shop you've used, and you will be in the running!!  It's that simple.

Until next time scrappy friends!