Showing posts with label Aall & Create. Show all posts

Sunday, 12 January 2020

Summer Fun with Tammy

Hello there!!

Well I'm feeling all summery as I am currently spending some time with the family at the beach.
Yay!!


Such a Summer Scene....

For this one, it was just after Christmas and the Sydney to Hobart Yacht race was on and I got thinking about summer and it's colours.
That made me think of Ken Done - who I adored as a teenager, I mean his colour choices are fantastic, and immediately I had the idea of recreating a Sydney Harbour Scene.


So let's see how it happened....


Firstly, gesso the page all over.

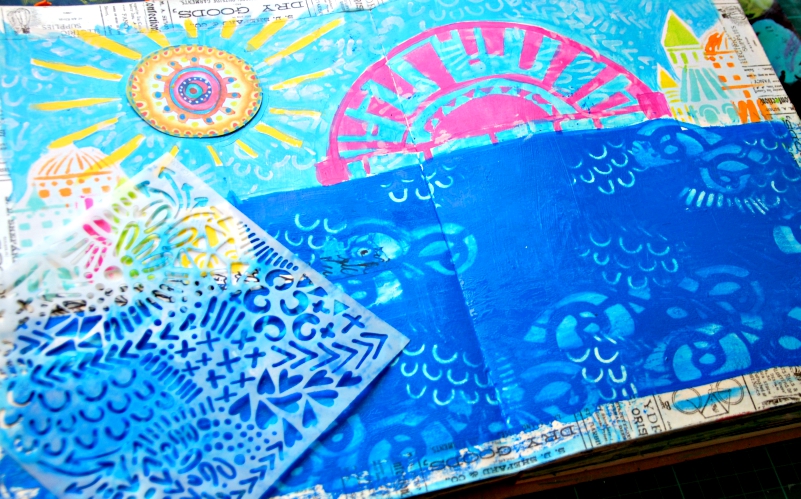
Now time to get out my stencils and bits and pieces from Scrap Matrix and look at them a little differently....


See that stencil '12x12 Sun Valley' by Art by Marlene for The Crafter's Workshop - that sunrise/sunset shape will make a perfect Sydney Harbor Bridge!

I taped off the bottom with some washi tape and then applied some paint through the stencil.


I used Bubblegum Pink by Dina Wakley paint as it just reminds me of those summer colours that Ken Done would use.


See... Instant Bridge!!

I grabbed out my Art by Marlene Die-Cuts #3and again looked at them a little differently.
This one was instant Ken Done sun.....just add some Lemon Dina Wakley Paint.


Next step, I grabbed a stencil '6x6" Floating City' by Art by Marlene for The Crafter's Workshop, and added some paint through it to create some city buildings around the edges of the harbor.


Now time to add in sky!!


Also time to add the blue sea water.
For this, I needed a deeper strong blue.


At this point, the sky and sea seemed a little flat, so I grabbed a couple of stencils - 
I rubbed through the paint with a wet baby wipe to take off some of the colour.
Much better, it helped bring the sky and ocean to life.


Ok, so whilst I'm looking at things a little differently, I grabbed some more Die-Cuts.
Some see leaves, I see the shape of the iconic Sydney Opera House.


Ok, so now I just need some boats in the Harbor, again leaves will be perfect, and these cute little bunting is just the piece.


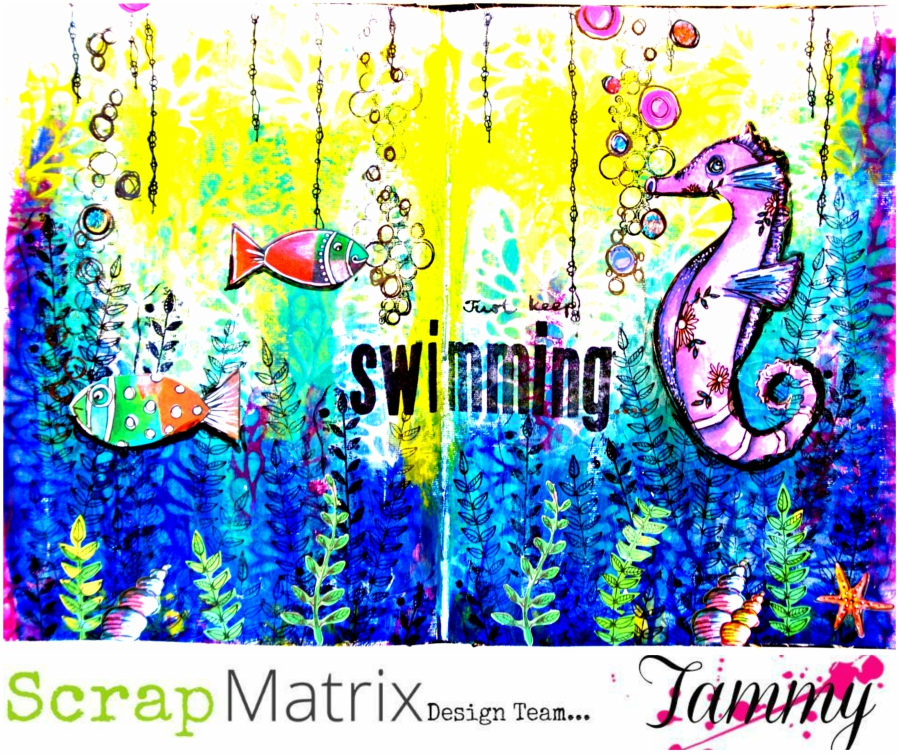
I then added detail with my black and white gel pen....


The final step was to add a fun painty border....


Ta da!! Time to look at your supplies in a different way....
What do you SEE??

I've got another share again today...


This one came to be as I found in my stash some napkins that were just screaming Summer.....


I began with white gesso, and then some big swipes of  'Sky' by Dina Wakley and 'Banana' by Paper Artsy. 
I love how they merged together and made lime. Yep I didn't wait for them to dry, I just went for it.


I then used '6x6 Floral Statement' Stencil by The Crafter's Workshop, and again rubbed off some of that paint through the stencil.


Ok, time to add that napkin.
I used different pieces of it and adhered it with Matte Gel.
Just don't forget to peel off that back layer of napkin first!


Now I need to blend it into the background, at the moment it looks like it's sitting on top.
To do this I grabbed one of my favourite flower stamps by Aall & Create and black ink and stamped it around the edge.


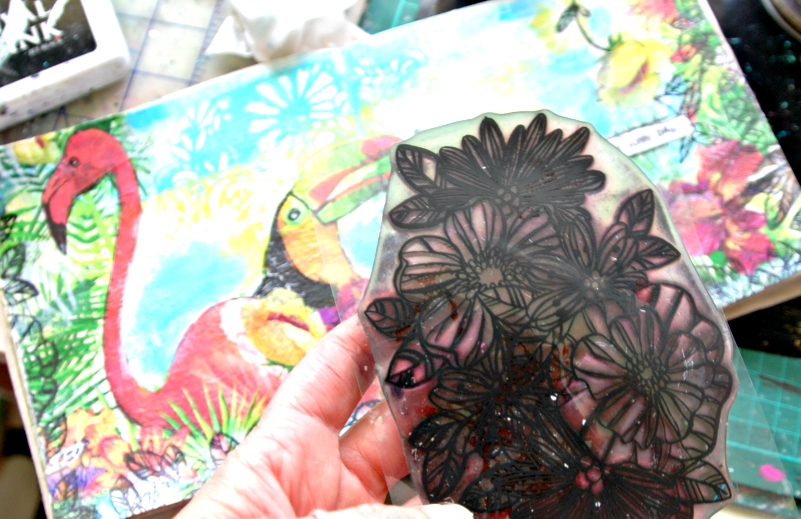
I added a bit of doodling and a perfect little saying from the Art by Marlene Stickers.


There you have it!!

Time for me to go and chase the sun and the waves.
If you'd like to see more you can head to my BLOG.

I hope I've inspired you today to try something different, to look at your supplies in a different way.

Luv Tam
xxx


Friday, 3 January 2020

Create your own Sunshine with Tam

Happy New Year Creative Souls!

I'm here today to share my Summer inspired Art Journal creation....


To me, this just screams Summer.
All about colour and waves and sunsets.


So let's take a look at how this came together.


I had been hoarding this 'Art by Marlene Ocean Window 12x12 Stencil' .....the shape of those flowers look like waves, and that inner circle just reminds me of the sun.

I chose some of my fave PaperArtsy Paints that are full of summery vibes.
I also used my larger Dina Wakley Journal.


I began by adding 'Zesty Zing' PaperArtsy paint with a sponge, focusing on the circular area
 (the sun).


I then added some of the 'Cerise' paint and blended it a little.
Keeping the stencil in place, I began adding other paints with a sponge.


I then decided to take the 'Zesty Zing' to the edge of the page.


It seemed a little harsh, so I grabbed the stencil, some 'Snowflake' PaperArtsy Paint and sponged over the top a bit randomly.


Adding that white back in pulled it altogether.


I then grabbed my fudeball pen and swirled it around the circle, adding a few scribbles.
I also went in with the stencil and paint and a sponge and added extra bits to the inner edge of the circle.


I then grabbed some of the Alpha foam stamps by Tim Holtz. 
I added the word sunshine, with black archival ink making sure it was to one side.
I didn't centre it, I rarely do.....it just means it doesn't then have to be perfect, whereas if it's centred I feel the pressure to get it exactly right.
I also like things a bit off centred, a bit unbalanced. A bit like me really.


I then added in my own writing to complete the quote.
I also went over the stamped letters with a white pen, and also added it into the circle too.


That's it!! 
A fun summery creation.


What colours say summer to you?
If you need some inspiration, check out our Summer Moodboard...


How can you not be inpsired by this?????

I have created another Art Journal Page (inspired by the fabulous Lisa Oxley)
I adore her colourful work.
I actually forgot to take photos as I went for this one. Whoops!
I'll leave a list after the last photo.

But basically I decided to select a colour from each of the colour pallettes above - yep mix it up completely!!


Just too cute....


 I used:


What does summer mean to you?
Add your creation to the Facebook Shares Group - just pop it in the 'January Challenge Folder', and let us know what Scrap Matrix Products you used.
I look forward to seeing your colourful creations.

I'll be back again soon.
xx

Sunday, 20 October 2019

Some bright fun Cards
with Lisa Amiet


Hello Scrap Matrix fans!
It's Lisa here today to share some Tracy Scott lovin' with you.

I have been playing with some awesome stamps designed by, 
our star of the month, Tracy Scott!

So here is the challenge


This is what I came up with :)


I really wanted to feature those awesome stamps on my cards,
so I first started working on the backgrounds.

For my first card, I have used my 'Ranger Blending Tool' and
'Distress Ink' in 'Picked Raspberry'
to blend a circle into the centre of my card. 


(Please excuse the quality of the first couple of photos. 
I had my camera on the wrong setting!)

I have then used 'Distress Ink' in 'Dusty Concord',
to blend the outside of the circle, overlapping them slightly.
I kept alternating colours until I was happy with how much they were blending. 


I have then used the same method for my second card, 
but using 'Distress Ink' in 'Shabby Shutters' for the centre.
For the outside I have used 'Distress Ink' in 'Peacock Feathers'


I have then used a variety of stamps to randomly stamp,
 in opposite corners of my cards. 

I have used the '7 Dots Studio Hazy Days'
and '7 Dots Studio Paint Chips' Clear Stamp Sets, 
with my 'Ranger Archival - Black'
for that bit of grunge ;)


I have also used my 'Art by Marlene Storms Don't Last' 
and 'AALL & Create #3' Stamp Sets.


Next I have stamped out my feature images for my cards using the
'ETS02 Stamp Set by Paper Artsy and Tracy Scott'


in the following 'Distress Inks':
'Mustard Seed', 'Broken China', 'Mowed Lawn', 
'Picked Raspberry' and 'Wilted Violet'.

I have then fussy cut them out to layer onto my cards. 


I have adhered them to my cards, 
layering them and using foam tape for dimension on some of them.


I have also used some 'TH Ideology Rub-ons Numbers',


in the corners of my cards, and I have also used the 'Life Quotes' one for my words, 
on white cardstock. 
 I then cut them out and adhered to my cards with foam tape. 


I love the bright whimsy feel to these cards. 


For some reason I felt that these had to be done in bright vibrant colours. 


I think the combination of blue and green is my favourite!


But I'm still loving this colour combo too!


I hope that you like what I have created!
I had a lot of fun playing along with this month's challenge. 
Tracy's bold stylish designs are fabulous to work with.

Until next time!

Lisa


Scrap Matrix Products used:

Tracy Scott ETS02 Stamp Set
'Picked Raspberry'
'Dusty Concord'
'Shabby Shutters'
'Peacock Feathers'
'Mustard Seed'
'Broken China'
'Mowed Lawn'
'Wilted Voilet'
Tim Holtz Ideology Rub ons