Tuesday, 10 March 2020

Jen's Paperartsy Goddess


Paperartsy Month!  Woohoo!  I love these products.

I’m so happy to be able to show you my creations this month. 

First I wish to share an art journal page that has been growing like a tiny seedling, in the part of my mind that dreams of creating, for a while now.  It has changed from the initial creative spark, taken a few side trips, back steps and thrown me into a fit of frustration from time to time, to the piece that I share with you today. 
  I hope you like it.


I’ve used my large Dylusions Creative Journal and sketched out what I hoped to achieve.


I then painted the sky/top part in Blueberry and the hair was a combination of Sargasso and South Pacific. 


I painted her face with Nougat and tried shading a little with Mushroom.  I then sponged Gold Rush over the Tracy Scott Stencil PS124.

  
I then added details with my pencils.

 
Next I removed a page from my journal and sponged Lilac, Electric Violet and Byzantium onto it.  I sponged Gold Rush onto a couple of stamps from Tracy Scott’s Stamp Set ETS34 and stamped them onto the paint.
 I also stamped Jo Firth Young’s flowers from Stamp Set JOFY82 with Archival Ink – Majestic Violet.  I cut these out, as shown, and attached them with 3D foam with some embroidery thread that I had braided.


On the rest of the removed page I sponged Lilac, Antarctic and Hint of Mint. 
I stamped the small flower from Jo’s Stamp SetJOFY76 with Archival Ink – Viridian randomly over it.  
Cut them out and glued them all over my pages.


   I added some dots of Gold Rush for more detail and added another braid.


Well there she is, my Paperartsy Goddess. 

I've mainly used all Paperartsy products.  You can find them at Scrap Matrix

I'm sorry I'm not very good at photography.  You can't see all of the details on her face but they are there and it looks good to me.  I've never tried a face this large before. 
 I have to thank all of you, and especially the rest of the Design Time, (and Vicki for giving me this opportunity), for pushing me and giving me the confidence to try something like this.  If I can do it , so can you.  Everyone is great at giving advice and direction, so I want to see you try something you've been dreaming of doing. 
 Don't forget to share it on the Scrap Matrix Shares facebook page.

Thanks for taking the time to check out my page.

Bye for now.

Jen
>^.^<


Sunday, 8 March 2020

Paper Artsy Challenge .... Lynn Good

Hi everyone, today I would like to share the art journal page that I have created for this months challenge - Paper Artsy Challenge.

I am a 100% die hard fan of all products Paper Artsy and so excited for this month.

I have used currently favourite stamp designed by Tracy Scott - ETS 28

This is my page:


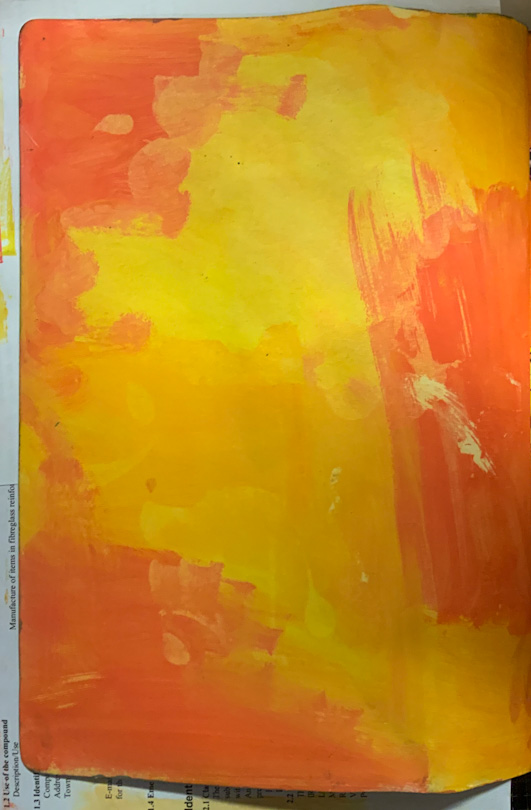
I began creating my background with bright colours from the Paper Artsy Fresco paint range


I find it easier to place blobs of paint around and then spread them out - always remember tho - if they are not next to or opposite each other on the colour wheel they will create mud!


I like to blend the colours together using a baby wipe as you will often end up with unusual spots of colour like on the right in the middler of the page.


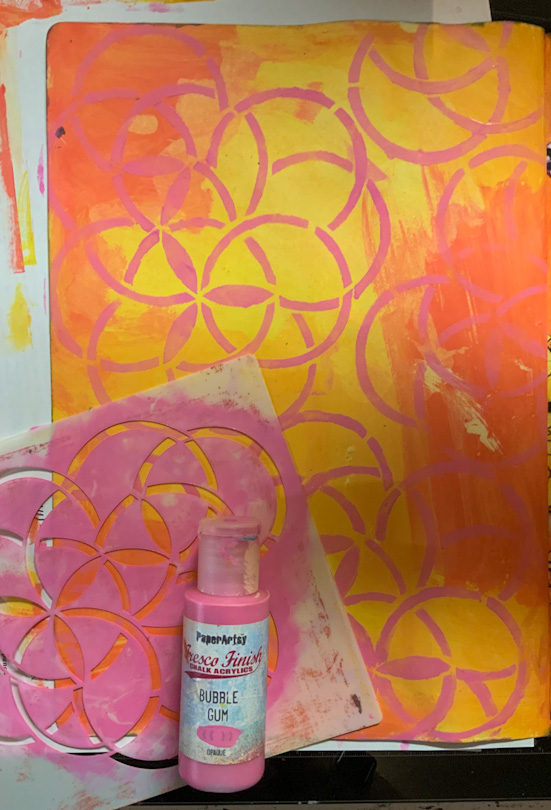
Using the Bubble Gum paint and stencil PS084 by JOFY I have added some contrast to the page.


I have then got lost in the creativity and forgot to photograph! I have used the stencil PS123 by Sara Naumann and Bubble Gum paint.  Then I added some more Zesty Zing and Little Black Dress with a spatula.  I felt that it was too dark so added some Snowflake paint across it all.


I then decided that it needed some random mark making.  I have used Tracy Scott's stamp ETS25 and Ranger Archival Ink to stamps around the page.


Now that by background was complete I stamped out some images from the Tracy Scott stamp set ETS28

I have used the Paper Artsy Smoothy cardstock for this. Once I finished stamping I fussy cut them all out.  I didnt end up using the butterflies but ended up using more flowers than shown in this picture.


Once I had the flowers where I wanted them, I adhered them with Matte Medium.  I then added  sentiment which is from Tracy Scott's stamp set ETS29 (by now you might realise that I am Tracy Scott Fan!!!). I have stamped this onto tissue paper and adhered with Matte Medium.

Final touches include some white Posca Paint pen marks, Stabilo ALL black pencil around the flowers, highlights with fluro coloured pencil and Liquid Pearls "White Opal' for the centre of the flowers.

I hope that you have enjoyed the process of creating this page, and if you are feeling inspired - create a page or layout for this months challenge:


To enter - just upload your project to the facebook page - Scrap Matrix Shares page and let us know one or more products that you have used that are available at the Scrap Matrix store - easy peasy !!!!

Til next time = Happy Creating


Lynn Good

Saturday, 7 March 2020

'Experiment'
with Lisa Amiet


Hello, Scrap Matrix fans!

It's Lisa here today to share some 
Paper Artsy lovin with you all!


My absolute favourite designer for Paper Artsy would have to be the 
awesome Seth Apter.
There is something about his grunge level that I just love.

So here is what I created


I have started by using my 'Liquitex Gesso',
to seal the page in my journal.


I have then used my 'Blue Fern Grungy Grid Stamp',
and 'Distress Ink in Weathered Wood'


I have used one of the stamps from the 'Paper Artsy ESA08 Stamp Set',
and 'Ranger Archival Ink' to randomly stamp my page.
Next, I have used my '7 Dots Studio Paintchips Hatched Stencil' 
and 'Dina Wakley Media Modeling Paste', to stencil randomly. 


I have then used a torn tag from the '12 x 12 Tags',
 from the Hazy Days collection from 7 Dots Studio.

I have also used that same circle pattern stamp and 'Vintage Photo Distress Ink'
to stamp onto '7 Dots Studio Writer's Block 12 x 12 Burden' paper, 
and then fussy cut them out. 


Next, I have used the main stamp from the set to stamp out, 
in both 'Weathered Wood' and 'Vintage Photo',
onto the '12 x 12 Burden Paper',
and fussy cut-out. 
I have then layered these onto my page, 
with cardboard in between for some dimension.


Next, I have used various ephemera pieces from the 
'Tim Holtz Idea-ology Expedition Pack', 


Add in a 'Lightbulb charm' :)


Yes, I scrunched that up into a ball and then straightened it back out,
I wanted some creases and roughness to it. 


I have also stamped out the 'Experiment' title and layered it onto my page. 


And finally, I added an 'Idea-ology Accoutrements - Classic',
layered with some 7 Dots Studio elements and word stickers.

I hope that you like what I have created. 
I'm really happy with how this turned out.

So, who is your favourite designer for Paper Artsy?
We'd love to see your take on this.

Until next time!

Lisa 


Scrap Matrix Products used:

Weathered Wood &
Vintage Photo


Thursday, 5 March 2020

Art is the door way...- Tanya Froud

Hi there People!!!
This month is all about the wonderful Paper Artsy products that can be found in store....have you checked out the whole range yet??? There is so much to choose from! 


Today I am sharing with you a shadow box i created using HP1605 Paper Artsy Stamp and Fresco Finish Acrylic Paints.

I used an old gift box for this project.

Next I used heavy white card stock and a pallet knife and dragged different Fresco Finish Acrylic Paints. in a variety of colors.... no need to be neat its going to be cut down!


Then I dried it and stamped multiple images. fussy cut these out individually ( save one of the image panel stamps to keep whole)


On another 2x sheets of heavy card stock and a Carabelle Stencil, I used some "Granny Smith" color and a small amount of sand and a blob of Finnabair Modeling Paste and mixed them all together. I then got the pallet knife out and dragged it through the stencil.
Dry completely.


Then water down some Fresco paints and add some color to the sheets of card. 
Cut one to make doors and the other to make a surround on the box. The aim is to make it seem like a door.


Give the inside of the box a coat of Dina Wakley Black Gesso.
Use the panel stamp Image you kept whole, as the background and then build up the images in the shadow box using foam tape to give height as seen in the photo
And then you have a it.. a little bit of mini art in a shadow box!!!!


Well that's it from me,
until next time!


Wednesday, 4 March 2020

Paper Artsy month: JOFY


What an exciting month.... I just love Paper Artsy products. 
The range is amazing and all the artists are so inspiring.
One of my favourites is JOFY. I have chosen to make cards using stamps and stencils.

Did you know that each person on the design team, link the products that they use directly to the Scrapmatrix shop?
 Press on the highlighted products and this will take you directly to the products used... shopping couldn't be any easier!!


For this card I have used black card stock for the background. I made the colourful strip across the centre using JOFY stencil PS165
I coloured the spaces by blending distress inks over the stencil. 
I have outlined each shape with a fine black marker, added some mark making to the circles and added a few smaller circles to the white space. 
The flower is a stamp from JOFY53 set and I coloured this in to match the background.


This card was created with layers. 
The background is green card stock. I have used stamps from JOFY91.
 I made a black and white strip  using the smaller flowers from this set, On a separate card I traced the stencil JOFY PS085 , coloured it in and cut out the whole shape. From the same set, I stamped 3 of the large flower. I coloured one flower to match and with the other two flowers I coloured the centre pieces in black and white. I layered these with some 3d paste.


For this little beauty, I created a background using Paper Artsy paints. I added another layer using Paper Artsy stencil PS016 and also added some stamping from JOFY 53. 
Once dry, I created the edging using the stamp from JOFY 80 and the centre flower is from JOFY 72. To create the white space, I watered down Paper Artsy paint 'Cloud 9' which allows the background to peak through.


I am sure you will have a lot of fun using Paper Artsy products for this months challenge. Looking forward to seeing your entries in this months challenge.


Tuesday, 3 March 2020

What do you see? Tam creates.....

Good morning creative souls.
Tam here today to share my first couple of Paper Artsy projects.

For this Challenge, I pulled out all my PaperArtsy Stamps and decided to look at them differently....
What could I create that's a little quirky and unexpected.


Meet Owlivia and.....


Finlay!

So let's see how they come together....

Let's start with Owlivia....


I knew I wanted to use my new Paper Artsy stamps - Tracy Scott ETS38 and JOFY 90
I hadn't opened them yet, so this challenge came at the perfect time.

I also dug out an couple of older stamps - both Tracy Scott ones - one from her previous release Tracy Scott ETS34 when she was last in Australia, and one from a couple of years ago -

As soon as I looked at the mini mandalas I saw owl eyes.....
So I loosely sketched an owl with pencil onto some Art by Marlene Watercolour paper. Very very loosely - you don't need to be able to draw, this is just to help with placement of the stamps.


Once the eyes were in, I immediately saw wings instead of flower petals,
 and feathers instead of  carvings....


Lastly, the mandalas became ear tufts and feathers....


Ok, now I had the base of my owl, it's time to add colour.

Lots of blending of colours and flicks of paint...


I finished it off with some doodles and pen work....


Love those eyes!


I enjoyed this so much I just had to try another one.....

I used three of the same stamps, but I also added in another older Tracy Scott set ETS09
Oh and I used the Tracy Scott set ETS 35, I just forgot to take a picture.


Time to follow the same process as Owlivia......

Love hearts became lips
Flower petals became a tail
A spiral for an eye
Circles for bubbles
and carvings and flowers buds for fins....


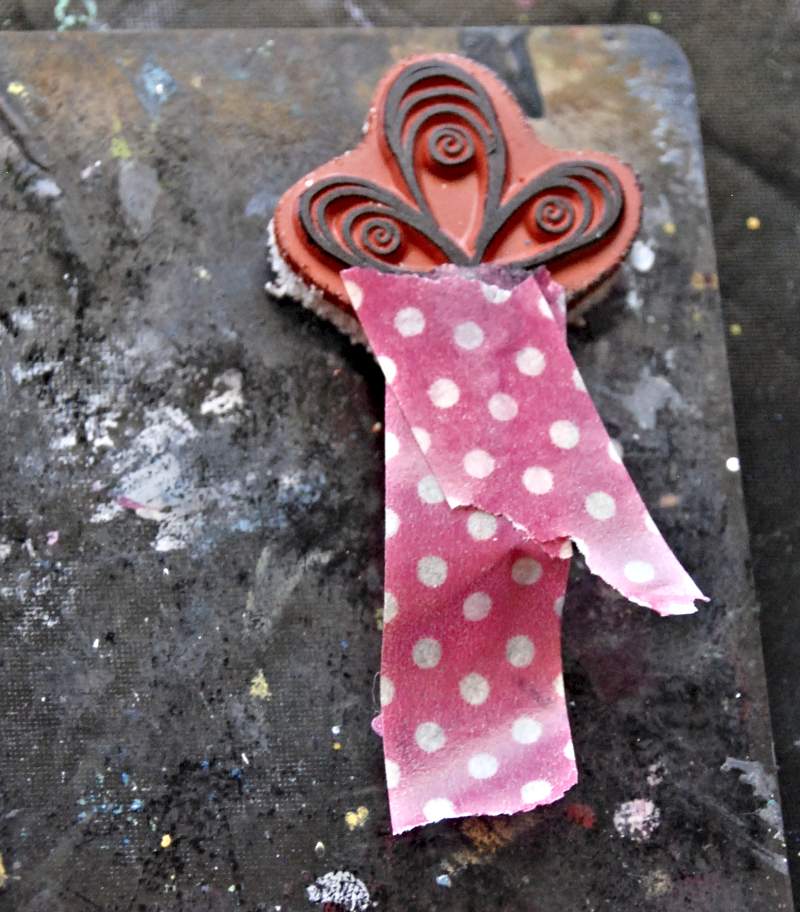
For a couple of these stamped images, I didn't want the entire stamp - for example, I didn't want the stem from the flower bud, so a quick easy solution is to cover with a bit of washi before stamping.


Time to add the watercolour, and the extra details with the penwork...


Happy with the outcome. 
Just love those lips.


If you follow my work you know I have created a couple of critters using stamps before.


In case you missed them you'll find the link to the HERE.

I'd love you to have a go at this fun technique.
What else can you see in those stamps?
Stand on your head, squint - you may be surprised what you find.....

What are you creating with the current PaperArtsy Challenge?
I can't wait to see.


Much love 
xx