
I hope you are all having a wonderful weekend - and Happy International Scrapbooking Day for yesterday. In honour of International Scrapbooking day I hope you all manage to squeeze some scrapping in sometime this weekend!
I'm on the blog today to share my second layout for this month's Monochromatic Tic Tac Toe.
To help jog your memory, here is the grid for you to use for Tic Tac Toe.

This time, I chose to use the line on the far left - Brads, Paint, and Chippie Shape. Seems easy right?
This is what I came up with:

Here is my step x step, including mini tutorial.
1. I applied clear gesso to my background paper. In this case I used 7 Dot Studio, Cotton Candy Dreams, "Brain Freeze"
2. Next, I created an ombre effect with Seth Apter 4 Paints Set 2 (Green Patina) on my background.

Ombre Effect Mini Tutorial
i) Select your paint and using a thick brush, apply a thick strip of the paint across your paper.

ii) While the paint is still wet, wet you paintbrush and drag down the paint in another strip.
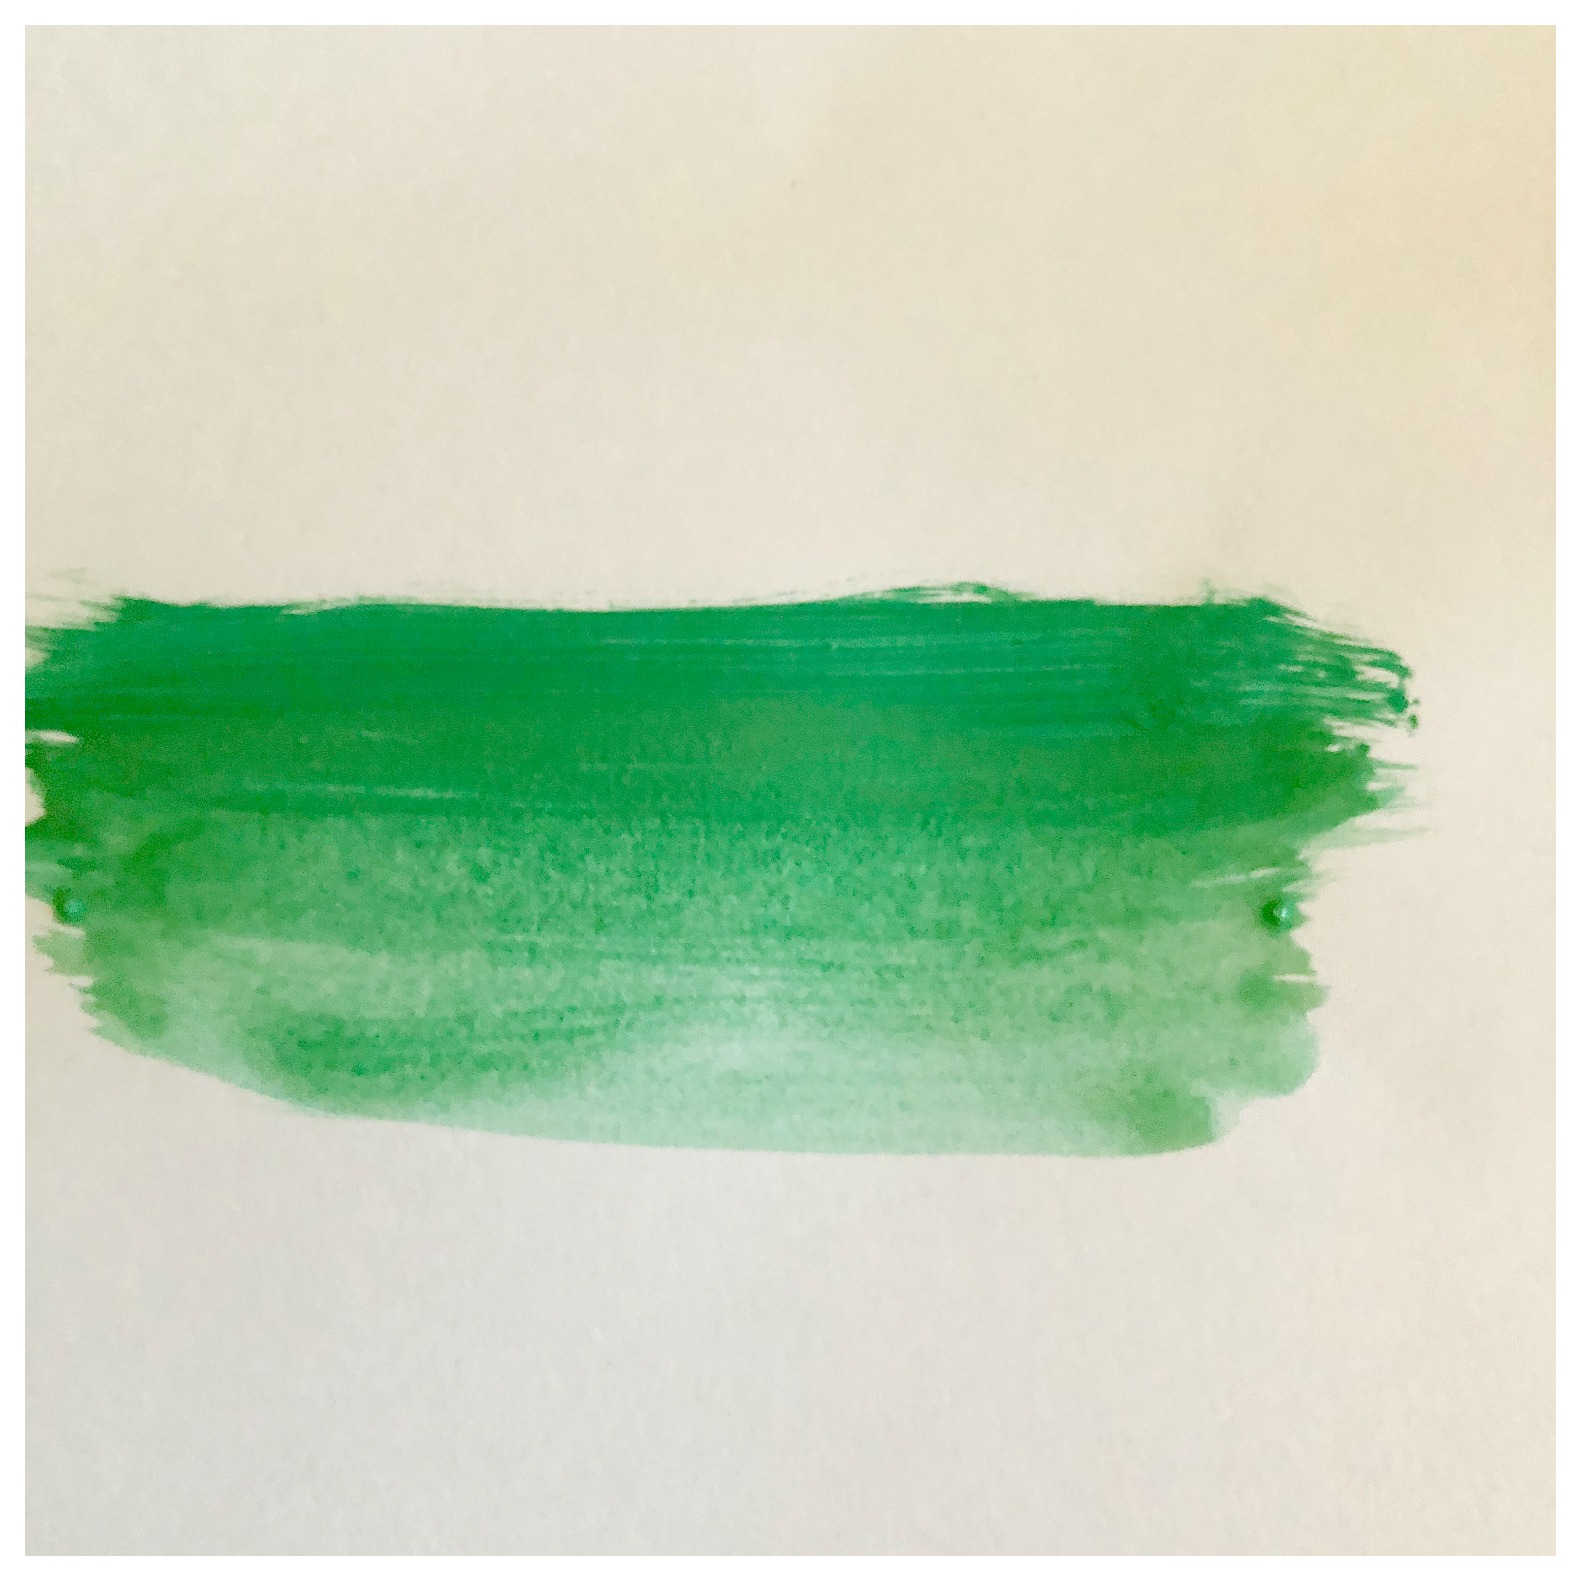
iii) Continue with this until your colour is almost transparent.

iv) Apply another thick strip of paint and repeat to create a mirror image.

3. Next I applied some texture paste with the 6x6 Prima - Flower stencil. I love this stencil - I use it so much, especially on my shabby chic style layouts.

4. Once I was happy with my background, I got a chipboard clock from the BFS - Roman Clock Set - Large and painted it with gesso.

5. Once dry, I coloured it with the Turquoise colour from the Dina Wakley Scribble Sticks Set 1. I chose the Scribble Sticks instead of the paint because I wanted more of a water colour effect on my chipboard, rather than solid colour. Scribble Sticks do a beautiful job of this.

6. Once I was happy with the colour of the clock, I adhered it to my background of my layout, as shown.

7. I then began to build up the layers under my photo. First, I matted my photo with the "Sugar Haze" paper from 7 Dots Cotton Candy Dreams. I inked around the outside then added another layer under the mat with some corrugated card, roughly torn into shape.

8. I then layered some tag elements from 7 Dots Studio Cotton Candy Dreams under all of this.

9. I cut out some circle elements from a scrap of paper from a Cotton Candy Dreams paper.

10. I then adhered my photo mat on top of the chipboard clock, and arranged the circle elements, some random flowers, word stickers, these buttons and this clear crystal stem from Scrap Matrix around my photo.

11. Finally, I added some more texture and interest by stamping some script and some leaves onto the page using the AALL&Create Stamp Set #42. For my title, I painted some chipboard words from 13 Arts Big Words - Fly Away set in the Paper Artsy Seth Apter 4 Paints (Set 2) Green Patina and adhered it onto my layout.
Since my photo was small, I clustered my elements, including my title, around the photo only - using a darker version of teal to create my visual triangle.


Well, that's it from me, hope you enjoyed my little tutorial and step x step. Please find below a list of products I used with links to the Scrap Matrix shop.
Don't forget, it you want to enter this challenge, you have until the 14th of May to upload your creation, naming the products you've used from Scrap Matrix, into the Monochromatic Tic Tac Toe challenge folder on the Scrap Matrix Shares page.
7 Dots Studio Cotton Candy Dreams Paper "Brain Freeze" and "Sugar Haze"
Hope you get to scrap this "International Scrapbooking Day" weekend.
xx

No comments:
Post a Comment