Showing posts with label Foamies. Show all posts

Thursday, 12 September 2019

Tam's Village using Art Foamies

Hi there creative souls!

Tam back today to share my second 'Art Foamies' Creation!!

This one was inspired by many of you who contribute to our Facebook Shares Group.
I love the little community we have there, and recently quite a few of you were creating cute little house pages so I just had to have a go....


And yep I got the idea for that border from there too!!!
LOVE IT!
Thanks everyone for the inspiration.


I just LOVE the explosion of colour and the contrast of that black and white border.
I also love the whimsical feel.


I used nearly ALL of the Art Foamies I own on this layout!!

Let's take a look at how it came together...

This page was sparked by your little houses. I knew I wanted to create a village scene.
I was playing around a couple of weeks ago with my Gelli Plate and my Art Foamies, and some of the prints I managed to create reminded me of sunrises....and well the page just grew from there.


These are some of the prints that I created that sparked the sunrise idea...

I made the papers using Dina Wakley Paints, my Gelli Plate, the 'Doodle Centre' Foamie and the 'Dino Skin Small' Foamie.

I just LOVED that pink and yellow sunrise/sunset image, so I adhered this to my page using Matte Gel.  I made sure one of the circular shapes was centred to act as my sunrise image.


I then painted some hills onto the bottom side of this....


Once dry, I added some mark making using the 'Dino Skin Small' Foamie and the 'Inner Struggle' Small Foamie. 
These are available individually, however, I purchased mine in a packet called 'Balzer Deluxe Small'. 
I think Vicki is out of stock of those sets at the moment, however I'm sure if you contacted her she would order them in for you. They are awesome for mark making.


Next step was to make some little houses and trees for my village.
I used 'Art by Marlene - Dutch Houses' Foamies.


I stamped them onto some old book paper.....


I did the same using a couple of the leaves from the 'Art by Marlene Leaf Geo' Foamies.
They make the perfect trees!


I then used the 'Balzer Ring Fling' Foamie to stamp multiple times.
 Once cut out they look like clouds!.
(Note this Foamie is also included in the Deluxe Balzer Pack, or available separately)


I then cut them all out, and outlined them in either black paint or pen.


Cute hey!!
Time to start sticking them down.


Love those clouds!


I added  a quote and a few little bits and pieces from the 'Art by Marlene Die Cuts Sheets'.
I mainly added these to the windows and doors, and made a little garden of flowers....oh and added a cute little birdie.


Lastly, I added that black and white border.
(Oh and a couple of cats!! Wouldn't be somewhere I want to live without them!)


Now just to decide which house I actually want to live in!! 
I think that little one on the left with the love heart and pink roof will be just fine.
Who wants to move in next to me??
What a crafty little village we would have.

Well that's it from me today.
I'll be back again next month.

I really hope you join us this month.
There's so much you can do with Art Foamies, so get playing!!!
Once done, pop over to the Scrap Matrix Shares page and pop it in the 'Art Foamies Album' for September.
Don't forget to tell us which Art Foamies you have used!!


Balzer Deluxe Small Art Foamies
Art by Marlene Dutch Houses Art Foamies
Gelli Plate

Tuesday, 3 September 2019

Tam's creation with Foamies!!

Hi all

Tam here today to share my first creation for our current Art Foamies Challenge!!
So much you can do with them!!

I thought I'd go with a layout first....I've got a few ideas for Art Journal Pages though....
so watch this space....


This one was inspired by a circle and floral layout created by our very own Elisa Ablett a few months ago.
Thanks so much for the inspiration Elisa.


So I began this layout by stamping a few of the circular foamies.
I added paint directly to the foamie and added a couple of colours at once.
I then stamped this directly onto some cardstock.


I used Dina Wakley paint in 'Lapis' and 'Lime' and 'Black'
and Paper Artsy Paint in 'Cerise' and 'Beach Hut'.
I blended a couple of them to get some different green shades too.

I used the following Foamies on this layout:


I then cut them out, and punched out some circles from the 'Writer's Block' and the 'Dino Skin' - I'll use these for the centres.


Here's what I cut out......yummy!
Once I'd cut out the circles/florals, I felt like they had a real fun child like vibe to them, so this then became the inspiration for my layout.
My journaling follows this too.
Yep up until this point I had no clue what I was doing!!!

So once I saw these, I was reminded of the layout by Elisa, so suddenly I had direction.....


Using my fudeball pen, I traced a cirlcular shape repeatedly onto my cardstock, adding in some scribbles and some black paint flicks.

I then added my photos, and began layering all my cut out pieces around one edge of the circle.


I stamped one of these phrases from a Dina Wakley stamp set for my title,
and added journaling  both around the title and along the edges of my hand drawn circle.


I added in an embellishment from 7Dots Paint Chips Die Cuts, and a couple of MAMBI chips as centres of flowers, along with some of the circles I punched earlier.


Simple yet effective.
Full of naive youth and vibrant colour, just like these beautiful teenage girls....

The journaling reads....
Enjoy these little moments.
All too soon you'll be off living your lives and these gatherings will be fewer and fewer...
don't take these moments for granted
enjoy them all
savour the moments and the friendships

and also....
You breeze in full of giggles and long legs and then you breeze out again and I'm reminded of the beauty and freedom of youth. Another life ago.


Well that's it from me today.

I had so much fun playing with the Foamies, they stamp beautifully, and I love that they stamp so well with PAINT!!!! cause you know me I'm all about colour and paint.
You just don't get these results with stamps.

I can't wait to see your creations....
Just head to our Facebook Scrap Matrix Shares Group and upload your creation in the 'September Foamies' Album and let us know what Scrap Matrix Products you used in the comments.

Oh the possibilities!!!


I'll be back again soon with some more Art Foamies Inspiration....

Much love and foamie fun

xxx


Sunday, 1 September 2019

Announcing our CHALLENGE for September!!!!

Well well well...
Here we are....the first of September!
That's nuts!!!

But it brings with it the promise of Spring and warmer weather and longer days which I am craving.
In fact, some of our DT have a real spring feel to their creations this month.

So let's take a look at the NEW challenge!!


These funky things are so much FUN!!

Let's take a look at the Design Team's Inspiration......

We are excited to have a couple of GUESTS join us this month!!
You will recognise their names as they are regulars over on our Facebook Shares Page.
They love  all things Scrap Matrix and some of their entries into our challenges have just blown our minds so we are thrilled to have them here playing along!!

PLUS one of our most loved original DT members has joined us too!
What a month!!!
INSPIRATION CENTRAL!


Aren't they just so wonderful!!

We really have a lot of talent here at Scrap Matrix.

We'd love you to enter our challenge this month.
Just create something using some Art Foamies.
(Vicki is stocked up on them ready for you!!)

Upload your entry into the 'September - Foamies Challenge Album' over on the Facebook Scrap Matrix Shares Page and let us know in the comments which Foamies you used.

Yep it's that easy.....
no blog required.
And the best bit.....there's a Scrap Matrix Voucher up for grabs, and you may find yourself playing alongside us as a Guest Designer!!!

Can't wait to see what you come up with!


Monday, 3 June 2019

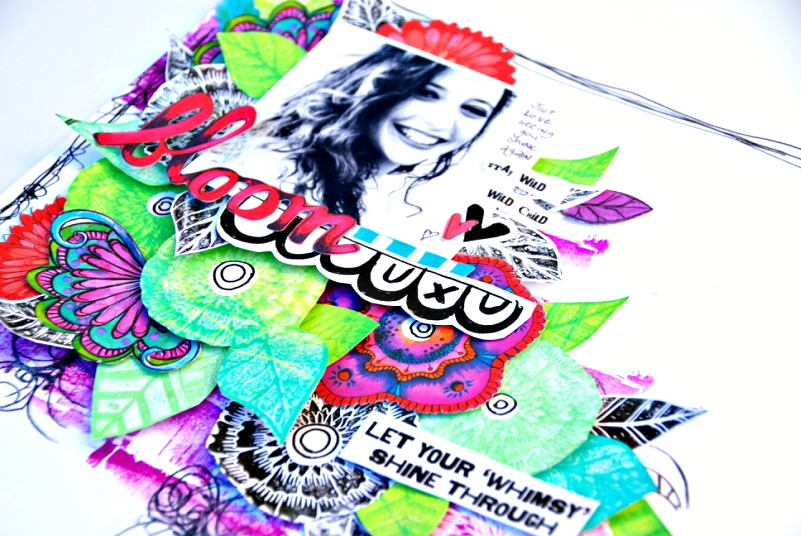
Tam's 'Art by Marlene' Creation......

Hi Scrap Matrix Creatives,

Tam here today to show you how I created my layout for our Monthly Challenge.

This month we are all about 'Art by Marlene'
After all she is a guest teacher at Scrap Matrix in June.....
how cool is that!


Yep typical of me....an explosion of colour!!!


So let's start at the very beginning....
(A very good place to start lol...)  Are you singing?

I began gathering all my NEW Marlene Products...


Naww, look at my kitty....always by my side when I create.

I just knew I wanted to use that gorgeous Texture Plate, so I pulled out my Gel Press

I began by adding some Dina Wakley paint in Blackberry and White .


I rolled it out using my brayer.


I then grabbed one of the new Foamies (Rebekah Meier - Broken Blocks) and stamped it into the paint, and then onto my white background. 

I just repeated it until I was happy.


I LOVE the effect of this!!

Normally, getting an effect like this would take heaps of  effort....and lots of water which would warp my page.  
This literally just took 2 minutes and absolutely no water - just paint.....so my page stayed flat AND it looks amazing.


As I had paint left on my brayer, I rolled it out again and then lay down the texture plate.

I stamped this off onto some cardstock PLUS did a 'pull' of the gel plate.
(If this makes no sense just keep reading, as I forgot to take a photo of this step, but have repeated it later with another ).

Above is what I achieved!!

I decided the background needed some depth so I added in a few more foamie stamps using 'Fuschia' paint.

I then dug out an older Art by Marlene Stamp that I keep forgetting is in my stash.
This is the perfect month to try it out.


I stamped this randomly over the purple background paint....


ok background done, lets allow it to dry...

Time to crack out that texture plate....

I added Dina Wakley Paint onto my Gel Press.

I used the colours 'Peacock' and 'Lime'.


I used the brayer to spread it and then placed the Texture Plate on top.


I then stamped this off onto white cardstock, and then 'pulled' a print from the Gel Press.

Oh my goodness.......just look at that!!


I kept going until my paint and brayer had run out.....
let's take a look at the results.....
Wow!


I repeated the above process using black paint (I just forgot to take photos!!)

Ok, so from here, I began to cut them out....I just knew I wanted to use them as embellishments.


You'll notice in there some black and white centers....
these come from the Whimsy Sticker Pack.
These are out of stock right now but message Vicki and she can order them in for you.

I also popped out a few of the Die Cuts from the 'Die Cut Booklet'
Same as above - so get your message to Vicki


Time to get layering.....I added these onto the background I created earlier.....some with foam tape to give extra dimension.


I also added in a few quote stickers, again from the Art by Marlene Sticker book....


and a border around the edge using my Fudeball Pen.
It just suited the 'whimsical feel'.


Here's a few more close ups.....


I'm loving those colours together!!


So that's it from me... ...

I can't wait to see your entries using products from 'Art by Marlene'.

Just create whatever you like using Art by Marlene products available from Scrap Matrix and upload your creation to our Scrap Matrix Facebook Shares page.
Don't forget to let us know what products you used.

That's it....you could win a shopping spree (voucher) at Scrap Matrix, so you can buy MORE products or you could be asked to be a guest designer.

What a month it's going to be!!!!

I'll be back again soon

Much love
xxx


Scrap Matrix Products used:
 
Art by Marlene Die Cut Booklet 
Art by Marlene Whimsy Stickers