
Hi Scrap Matrix Creatives,
Tam here today to show you how I created my layout for our Monthly Challenge.
This month we are all about 'Art by Marlene'
After all she is a guest teacher at Scrap Matrix in June.....
how cool is that!

Yep typical of me....an explosion of colour!!!

So let's start at the very beginning....
(A very good place to start lol...) Are you singing?
I began gathering all my NEW Marlene Products...

Naww, look at my kitty....always by my side when I create.
I just knew I wanted to use that gorgeous Texture Plate, so I pulled out my Gel Press
I began by adding some Dina Wakley paint in Blackberry and White .

I rolled it out using my brayer.

I then grabbed one of the new Foamies (Rebekah Meier - Broken Blocks) and stamped it into the paint, and then onto my white background.
I just repeated it until I was happy.

I LOVE the effect of this!!
Normally, getting an effect like this would take heaps of effort....and lots of water which would warp my page.
This literally just took 2 minutes and absolutely no water - just paint.....so my page stayed flat AND it looks amazing.

As I had paint left on my brayer, I rolled it out again and then lay down the texture plate.
I stamped this off onto some cardstock PLUS did a 'pull' of the gel plate.
(If this makes no sense just keep reading, as I forgot to take a photo of this step, but have repeated it later with another ).
Above is what I achieved!!
I decided the background needed some depth so I added in a few more foamie stamps using 'Fuschia' paint.
I then dug out an older Art by Marlene Stamp that I keep forgetting is in my stash.
This is the perfect month to try it out.

I stamped this randomly over the purple background paint....

ok background done, lets allow it to dry...
Time to crack out that texture plate....
I added Dina Wakley Paint onto my Gel Press.
I used the colours 'Peacock' and 'Lime'.

I used the brayer to spread it and then placed the Texture Plate on top.

I then stamped this off onto white cardstock, and then 'pulled' a print from the Gel Press.
Oh my goodness.......just look at that!!

I kept going until my paint and brayer had run out.....
let's take a look at the results.....
Wow!

I repeated the above process using black paint (I just forgot to take photos!!)
Ok, so from here, I began to cut them out....I just knew I wanted to use them as embellishments.

You'll notice in there some black and white centers....
these come from the Whimsy Sticker Pack.
These are out of stock right now but message Vicki and she can order them in for you.
These are out of stock right now but message Vicki and she can order them in for you.
I also popped out a few of the Die Cuts from the 'Die Cut Booklet'
Same as above - so get your message to Vicki
Same as above - so get your message to Vicki

Time to get layering.....I added these onto the background I created earlier.....some with foam tape to give extra dimension.

I also added in a few quote stickers, again from the Art by Marlene Sticker book....

and a border around the edge using my Fudeball Pen.
It just suited the 'whimsical feel'.

Here's a few more close ups.....
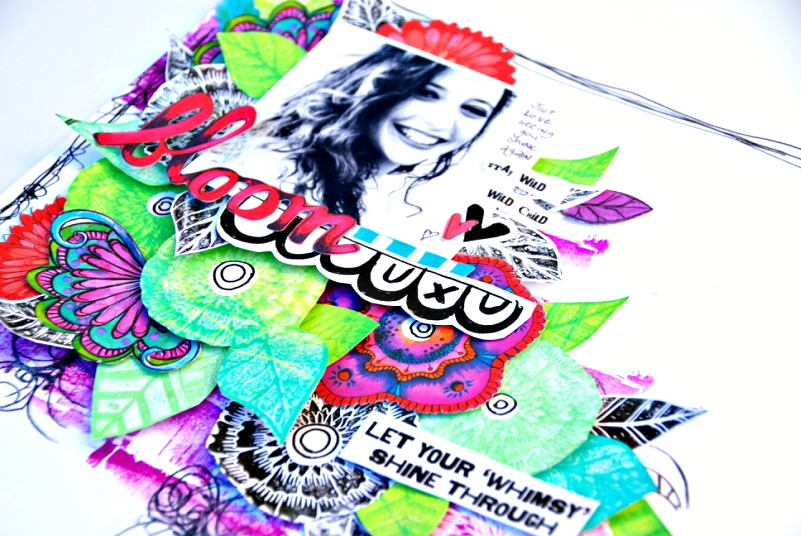

I'm loving those colours together!!


So that's it from me... ...
I can't wait to see your entries using products from 'Art by Marlene'.
Just create whatever you like using Art by Marlene products available from Scrap Matrix and upload your creation to our Scrap Matrix Facebook Shares page.
Don't forget to let us know what products you used.
That's it....you could win a shopping spree (voucher) at Scrap Matrix, so you can buy MORE products or you could be asked to be a guest designer.
What a month it's going to be!!!!
I'll be back again soon
Much love
xxx

Scrap Matrix Products used:
Art Foamie - Rebekah Meier - broken blocks
Art by Marlene Stamp
Art by Marlene Stamp
Art by Marlene Die Cut Booklet
Art by Marlene Whimsy Stickers
No comments:
Post a Comment