Showing posts with label Faber Castell. Show all posts

Sunday, 2 September 2018

Thankful by Sandra Brimelow

Hi everyone, I am pleased to be back as a guest designer for Scrap Matrix, for the frames challenge. Here is the graphic for the challenge:


When you think about it, there are many ways we can use frames on our layouts. You could use chipboard or wood veneer frames, doodled or stitched frames, a frame of flowers, patterned paper to frame, the list is endless. 
I was sent some gorgeous chipboard frames to play with for this challenge, and this inspired my layout.

Thankful
 
The background to my layout was created using these gorgeous patterned papers from 13 Arts. I used Dream and Destination. 


Now I ordinarily do not like to work with purple, but these papers were so lovely to used, I had to draw the purple out to use on my layout. I added a wash using Tim Holtz distress oxides - Wilted Violet and Bundled Sage  to the background. Using the TCW stencil - coffee splotch and Finnabair Texture Paste - antique silver crackle, I added some silver to background to provide a frame to the outer edge of the paper. I also did some faux stitching as another border, to the corners of the paper.


I wanted to add a bit more framing around the photo, so I did this using Paper Artsy JOFY 26 stamp set which I coloured with Faber Castell gelatos - Metallic Grape, Lavender, Fig and Metallic Ink.


Finally to embellish, I added Blue Fern Studio flowers - late winter lillies, MAMBI chips - Hey you collection, Tim Holtz Ideology - Big Chat and Small Talk. Underneath my photo, I have laid some German Scraps.


I must admit, initially I was a bit nervous about doing the framed challenge as a guest designer, but I am so very pleased with how this layout turned out. I hope you can find time to play along with the challenge. Until next time........Sandra


Scrap Matrix products used:
 

Monday, 25 December 2017

Rebecca's First Paper Artsy Share

Hi Everyone and MERRY CHRISTMAS!!!

Rebecca here with you today to share a little OTP makeover. This little box was previously a gift box for a beautiful coffee cup. Rather than throw away such an excellent sturdy box I decided to give it a little sprucing up. Paper Artsy Stamps, Gelatos and Prima Watercolours created magic here and transformed trash to treasure.
I was fortunate enough this month to work with this GORGEOUS set of stamps designed by Tracy Scott for Paper Artsy. I believe this set of stamps is so versatile, they can be used for all paper crafting - mixed media, card making, layouts!!. 


Faber Castell Gelatos, Prima Water Colours, Finnabair Mica combined with the stamping created the exact look I was hoping to achieve. Black stitching to provide a nice boarder. A coat of Soft Gloss Gel to seal the colour and give a nice sheen. 


I very much look forward to seeing all your creations in the Paper Artsy challenge this month!

Wishing you all a very happy and creative day.

~ Rebecca ~
Scrap Matrix Products Used


SaveSave

Wednesday, 8 November 2017

Rebecca's second Watercolour and Words Share

Hello Everyone, 

Today I am here to share with you a mixed media canvas. This canvas is just popping with Faber Castell Gelato colour, isn't it pretty?, the colours used are from the 'Brights' collection. 

This canvas has now moved into my daughters bedroom, she fell in love with it and requested to have it hung on her wall, I could not refuse. 
To begin I die cut some corrugated packing card (recycled from a recent parcel) and painted the small hearts with Art Basics Heavy Gesso in White and allowed to dry. Lightly I used the red gelato on the raised portions of the cut card and then began smudging all the red in with my finger. 


Using Art Basics Soft Matte Gel I adhered some vintage sheet music and washi tape to my canvas, technically you shouldn't need to stick washi tape but I wanted extra assurance it was not going to lift. 


Scribble scribble and smudge with three different colours of gelato.....


Through the Maremi Small Art Cell stencil I used a palette knife to apply Art Basics Soft Matte Gel. Using an orange gelato on a sponge (which was included in the Brights kit) I dabbed through the Bubbles Tim Holtz Stencil. After this point I also added some stamping and glossy accent dots which were finished with Finnabair wax. 


I adhered my hearts then extra shading was applied and smudged around my dried gel bubbles and hearts using a black Faber Castell PITT pen. 


Many thanks for your time today and as always if you have any questions please feel free to ask. 


Scrap Matrix Products Used


Tuesday, 24 October 2017

Rebecca's first Watercolour and Words Share

Hi Everyone,

Rebecca here with you today to share my first Watercolour and Words project with you all. This month I was fortunate enough to work with the wonderful Faber Castell Gelatos in colour collection Brights. 

Have you ever crafted with gelatos? can I let you know how much I LOVE them!!. Gelatos have always rated very very highly on my 'always have in my craft room list' ever since doing a 2 day workshop with Donna Downey. 

I have created 3 tags combining Gelatos, Paper Artsy stamps, Scrap Matrix Metal and Tim Holtz Paper Dolls. Side note on the Tim Holtz paper dolls, Vicki has had these on back order for quite some time. A super popular and often sold out item world wide. We are all crossing our fingers that they will be in Scrap Matrix store very soon. 


This is the one and only stamp set I used to create all 3 tags, just look at these stamps, AMAZING. You could use these stamps for so many things, tags, cards, scrapbooking, journaling. Endless opportunity. 


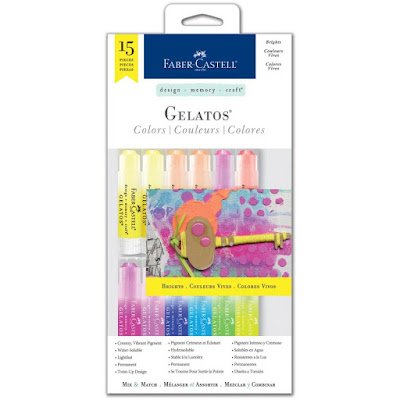
Faber Castell Brights pack, 15 wonderful little colourful babies. If you not worked with these before, they wind up like a chapstick, the colour is super pigmented and a little goes a very long way. Very good value for money. 

 Faber Castell Gelato - Brights

How do they work? how did you get that colourful background? the answer is so simple!!. The below photo will show you the three step process

  1. I began by painting the tag with with white gesso
  2. Scribbled over each tag with 3 different coloured Gelatos
  3. Colour smudged it all with my fingers, very carefully I used 3 fingers, not wanting to smudge colours too badly between each other. 


Now for a few close up photos, tag by tag......


Thank you all for checking in here, I wish you all a very happy and creative day! 


Scrap Matrix Products Used