Showing posts with label Ayeeda Inks. Show all posts

Friday, 1 June 2018

Guest Designer Deb - The Point is.....

Hello Scrap Matrix friends,

Deb back with my second take on the May challenge - The point is.....

This time I went with the pointy option, using arrows and triangles - items available from Scrap Matrix.


I took a piece of paper from the Stamperia Atelier paperpad as my background piece and using the AALL & Create #20 stencil, along with distressed triangles stamp from the Paper Artsy JOFY 34 stamp set, combining with 13 @rts Splash Gold Glitter Ayeeda Ink, and Dina Wakely Acrylic paint in Turquoise and Rosy, I created a background around where my photo was going to go. The 13 @rts gold glitter ink worked quite a bit better with the stamp than I thought it would, and I really love how that turned out.


Whilst waiting for that to dry, I edged the base paper in the glitter ink as well.

Once all the mixed media was dry, I mixed the paints with some water and added some splatters to the background as well as some glitter drops, and then used the paint the same way, and added some pearls of Turquoise and Rosy.

 I also inked the edge of the photo mat with the gold glitter ink, and painted the 13 @rts Out of the Blue chipboard title and a couple of arrows as well.  I used a small round brush to do this and when almost dry added more glitter ink to the places that were patchy.  I will certainly be using this technique again.


I let this all dry overnight so as not to smudge any media and instead of twiddling my thumbs  I took another sheet from the paper pad and cut out the tags to create the layers under my photo.  I also took a sheet of tags, etc from the 13 @rts Art Journey 6x6 paper pad and cut out some circles, some arrows and some of the words on another sheet, as well as fussy cutting some flowers and a flutterby.


I placed the tags in the centre of the dry background,

then added the matted photo, before finishing off with various embellishments, including a puffy sticker from Pink Fresh Escape the Ordinary as well as a chipboard arrow head from the same collection.   Finally I placed the title layering some of it over the bottom of my photo.


 And thats it.

Hope you like my layout and have picked up a tip or two :)

A huge thank you to Vicki for allowing me the privilege to Guest Design for Scrap Matrix and showcase some of the wonderful products available in the shop. 

Supply List:
Stamperia Atelier paperpad (Out of stock) but other collections are available
Dina Wakely Acrylic paint
small round brush
13 @rts Out of the Blue chipboard
13 @rts Art Journey 6x6 paper pad
Pink Fresh Escape the Ordinary

Go forth and create my friends :)

Friday, 3 November 2017

Guest Designer - Sandra Brimelow

Hi everyone, this is Sandra Brimelow, back with my second share for October for Scrap Matrix as a guest designer. This has been a real privilege, thanks Vicki.


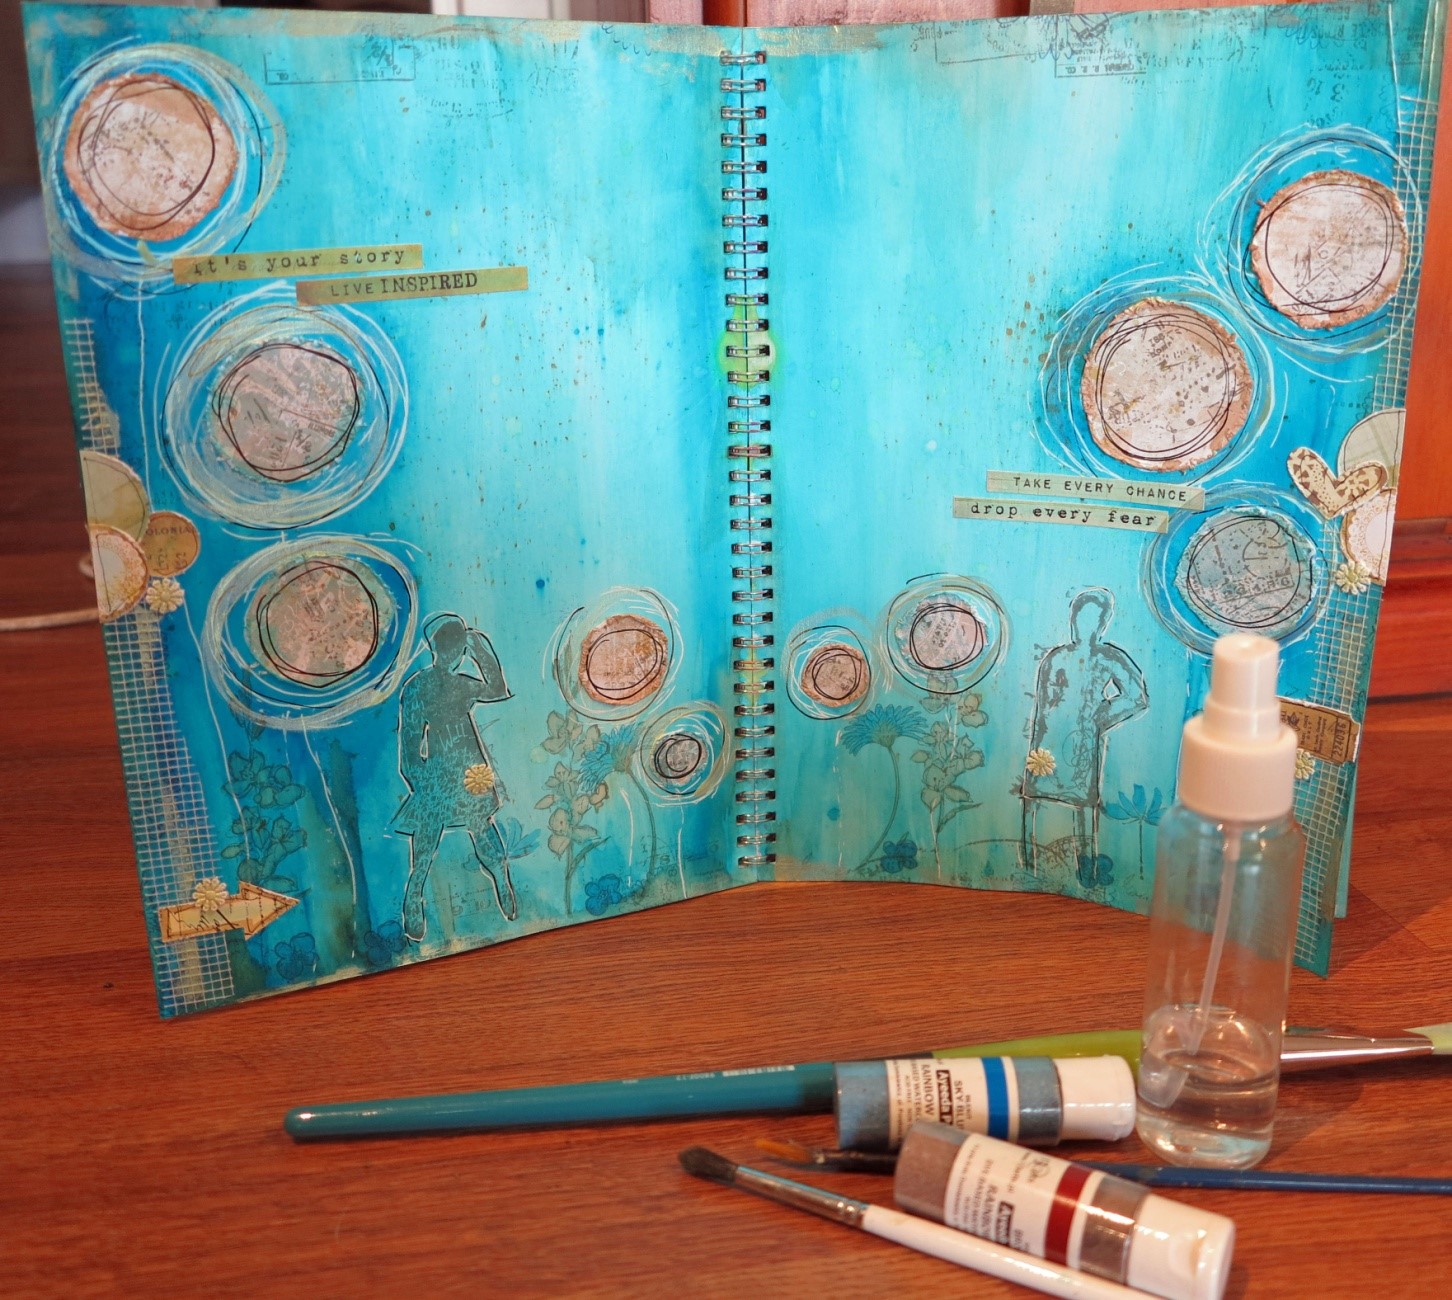
So, for my second share, I have an art journal creation. I am reasonably new to art journaling, so still finding my feet with it. I loved doing this one though, as the products I used are just so much fun.
I really love the 13 Arts Ayeeda watercolour powders, and this was the main feature used on my art journal spread.


With these powders, the more water added, the more dilute the solution, and with less water the more intense the colour. 


So with the sky blue, I spread this over my art journal page, adding water as I went, adding more powder – even to the page, and continued spreading it until I was happy with the look I was achieving. I dried it in between layers, to be able to add more intensity in some areas. 


I added splashes of water to the layers as well, to create some spots on the spread colour.


I used the most basic of tools for my art journal, grabbing the trusty paper tool, and I removed sections of colour as well, as really wanted some differentiation on the pages. 


Once I was happy with the layers, and after drying them all off, I then added some more intense colour with a spray in the mini mister, as I wanted to create some flowers. 


I then started to bring in the brown watercolour as well.


After I was happy with the background colour, I sealed it with some clear gesso.
I grabbed my white sharpie and gel pens, and started to draw circular shapes onto the pages


I cut out some circular shapes from some leftover Blue Fern Studio patterned paper, and added this to the pages. 


The next step was to do some random stamping around the pages.


I mixed the blue and brown watercolour mixtures to make a greenish colour, adding another colour tone to the pages, and painted the stamped images with this and also with the straight diluted colours.


To then added some plasterers tape, 7 Dots Studio Lost and Found elements and word stickers.


To complete the pages, I grabbed some Art Alchemy acrylic paint, and randomly painted this around the paper flowers


So the completed art journal pages were a complete surprise to me, how the watercolour powders would work with techniques I used. It was a completely random process, and a great way to explore some very fun products. 


Scrap Matrix Products used:


Monday, 23 October 2017

'Allow your soul to grow' by Elisa Ablett

Hi everyone,

Elisa here from the design team with my layout created for the Watercolour and Words challenge. I thought i would share the close ups of the finer details of the layout and a handy step by step tutorial on how i put the layout together.

The main focus of my layout was using the Ayeeda Water Inks from 13 Arts and the versatile 13 Arts - Strength in Numbers Chipboard Sheet.


Here is my finished layout, I love the boho look of the watercolours and flowers so I decided to continue that on with some hand drawn flowers and vines.


Lets have a look at how I used my focus products to create my layout:


Step 1 - I drew a very faint line halfway down the page and then sprayed water onto the bottom half of page tilting the page to let the water run down. Then drip the pink and scarlet Ayeeda ink onto the water letting it pool in the water that you have sprayed on.


Step 2 - Add a couple more colours to your page, you can use a pipette to have more control where your colours end up.


Step 3 - While your page is still wet add 13 Arts Splash Glitter Ink - Pink using the dropper provided.


Step 4- Ink your chosen chipboard Kinder Kreations Zen Leaf Chipboard with a black ink pad and let dry, once dry thread the wire ends of your Green Crystal Stems through the chipboard leaves.


Step 5- to start your flowers ready for fussy cutting - Spray your craft mat liberally with water and then add drops of ink onto the water, grab a piece of white mixed media cardstock and turn it upside down and smooth over the ink. You will end up with a sheet of coloured paper ready for you to stamp on. I did two of these sheets and made one with darker colours and one with more violet and green. Put it them aside to dry. You can also flick water onto the page to create a distressed look like the photo below.


Step 6 - Once your background has dried, grab a black marker and hand draw (or zentangle) (or if you aren't confident in drawing download a free template, or trace a design in) 


Step 7 - I found an old transparency from Kaisercraft and cut it up to use as a feature piece on my layout then layered German Scrap - renaissance-petite-black trim and German Scrap - ornate-garland-2-black and black /molossi-crystal-lines


Step 8 - Glue down your chipboard pieces and crystal gem and Scrap Matrix metal- leaf-pretty-silver as pictured above, add some stamping and extra crystals.


Step 9 - Now onto the stamping, I used an awesome set of stamps (Paper Artsy -e-tracy-scott-11-a5-set) that are available in the Scrap Matrix store today. I stamped on both sheets of paper that I made with the coloured backgrounds. I then fussy cut all the pieces out.


Step 10 - Glue your photo down along with the green fussy cut border like the photo below.


Step 11 - Layer all your pieces by using 3D foam mounting dots and glue


Step 12 - Using the pink glitter ink from 13 Arts and the dropper provided add small drops to the butterfly as an added feature.


Step 13 - Pick your desired Chipboard and stickers - I used 13 arts 'Small saying's stickers and 13 Arts chipboard. Colour your chipboard with your green watercolour 13 Arts ink and let dry, once dry glue it to your layout. Also add your sticker to your page, i added mine to the side of my photo.


Here are some close ups of the finished layout!


Well that's it from me! 

I hope you have enjoyed the tutorial and seeing how my layout came together.

Don't forget to leave some love and make sure you visit the store either in person or online to say Hi! and check out all the wonderful and unique products.

Hugs

Elisa xx