Hello creative ones.
Tam here with a couple of projects. Now these only have a smidge of bling, a spattering.
You see, although I'm a massive fan of sparkles and the magic around Christmas time, I find it hard to add bling to my pages.
As you know I love to add colour and paint - and this is usually matte.
So this challenge had me a little stumped.
Add to this the fact that I've been in a creative rut for a few weeks.
My mental health really needs me to find that damn mojo.
One of the ways I find the hiding spot of my lurking mojo is to crack OPEN something NEW!
I've been hoarding the Dina Wakley Collage Collection!!
I just love Dina's style, and I just wanna flip through the book - NOT cut it up!
But it was time.
My mojo had made sure of that.
So here's my first creation with it.....


Boom!!
Mojo back!


Let's take a look at how it came together though, because it did take me a while to nab the sneaky bugger.

I began with that gorgeous collage collection and my Dina Wakley Art Journal.
I found myself still a bit overwhelmed at this point so I actually jumped on YouTube and watched a couple of videos.
One was by Niamh Baly - and that was it - Bam!! I knew what I wanted to do!
Thanks Niamh for helping unearth my creativity again. xx
I think I've discussed before the way I manage you tube.
I only ever allow myself to watch 1-2 videos then it's create time.
Sometimes watching someone else creates leaves me feeling itchy to play and has me running straight for my craft room.
However it is easy to get bogged down and watch video after video.
DON'T LET THIS HAPPEN
It's a time warp.
1-2 then get OUT!!

Ok, so after flipping through the book, I decided to start with some of my fave colours.

I very randomly squeezed out some 'Peacock' Paint.

Then I took to it with an old store gift card.

I then repeated this process adding some 'Lime'.

I tore out one of the faces (as inspired by Niamh).
I love that these pages are the same size as my journal, so I can add them in as extra pages very easily. Perfect fit.

I cut around the side of the face, and then trimmed the right side off a little too.

I then added it to the right hand side using some Dina Wakley washi tape.
Make sure you add some to the inside of the flap too.
Instant extra page in my journal.
I love these interactive elements.

Ok so now that it's there, I need to bring in that pink that's on the reverse side.
I used 'Fuschia' paint to do this.

Again, random.

From the scraps cut off the face, I cut out some circles and half circles.

I then went in with some white gesso and a baby wipe and that gorgeous leaf stencil called 'Deco Leaves' by The Crafters Workshop. Definitely my current fave.
I also added in a touch of 'Ruby' paint to go with the inner circle on the reverse of the flap, and also a touch of 'Evergreen', just to help blend the colours a little.

I then did the same with black gesso, and added some random flicks and lines.
This is when I felt it all came together.

I then stuck down my circles using matte gel medium.

I decided to add my title using Dina Wakley collage Words - 3x3" set.
I tore it up and placed the words so they were peeking out from under the flap.

Stick this down with matte gel medium.
NOW's the time to add in some bling.
I added swipes of gold to my layout. I used the PaperArtsy 'Gold' Paint.
Tracy Scott introduced me and at first I was all 'oh no I like it without', but now I'm converted.
Pffffft!
It just adds some depth, some interest.
It kinda lifts the whole project.....
Sometimes you don't need a stack of bling....just a touch of sparkle will do!


I added some scribbles to the page and around my circles using my fudeball pen.

Finally I added some journaling in that circular shape underneath the face.

There you have it.
By the time I was half way through this creation, I knew my creative block was gone!
Thank goodness...I can breathe again.

Let's take a look at the interactive flap now that the page is finished.

If you haven't seen the Dina Wakley Collage Collective.....it's so worth a look.
Page after page of gorgeous loose scribbly art.
There's tags, die cuts, washi tape looking strips, faces, just so much, and the great thing is they a afterre featured in both thick cardstock and a finer paper - perfect for adhering with gel medium.
I was so happy with the result, I decided to create something else.
I follow Susanne Rose and she often creates circular patterns, adding stamps, die cuts etc. They always look amazing, and when I saw the cute little bird page in the Dina Wakley Collage Collection, I thought I'd give it a try......
(thanks for the inspiration Suzanne xx)

I used Dina Wakley Scribble Sticks for this one, and I added a couple of Tracy Scott stamps from the NEW ETS35 set

I added a few swipes of 'Gold' PaperArtsy paint and I also rubbed some through the 'The Crafters Worshop Deco Leaves Stencil'.
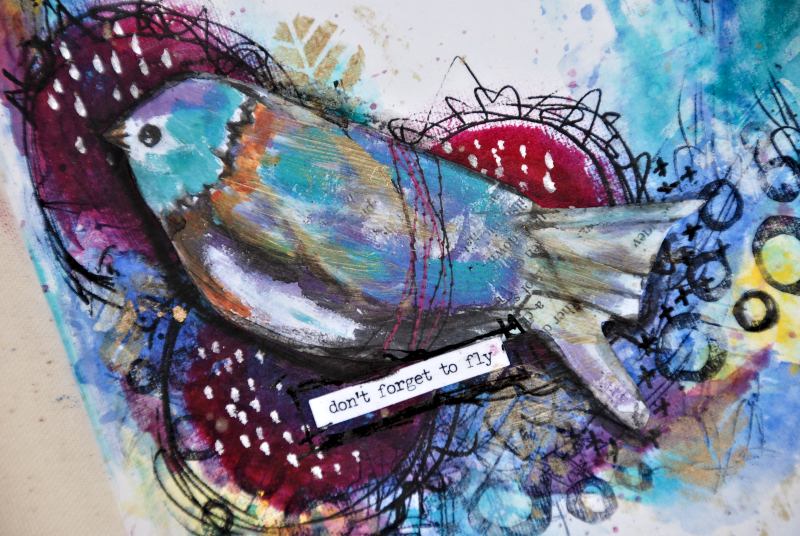

After I finished and stepped back, I noticed the outer circle kinda reminded me of a bird nest, and those large circles were a bit like eggs!
That's part of the joy of art journalling - things kinda just happen.
Once you get in the moment, the art kinda just falls onto the page.
That's it from me!!
I'll see you all again in 2020.
Thanks so much for following along with me this year, and a big hug to all of you who comment either on Instagram, Facebook, the blog or privately.
I love knowing that I have inspired you in some way.
It makes all the late nights (with wine)! typing these up worth it.
So much love, Tam
xxx