Showing posts with label Art By Marlene. Show all posts

Wednesday, 12 August 2020

Tam's back with more drips.....

Hi lovelies

Tam here again to share another drippy creation.....


A drippy girl.....


To create this one I used the following products:


I began by applying white gesso to my page and then sketched a face.


I then used the Prima Bloom Stamps.
I love this stamp set.
Everyone should have this in their collection.....

Firstly I stamped each one onto scrap card and then cut them out.
I use these as masks.


I stamp directly onto the page using archival ink.
NOTE this ink must be waterproof so it doesn't reactivate when liquid is applied.
I then cover that stamped image with it's mask, ensuring it lines up...


I then stamp the next image, overlapping slightly.
See how the mask works?
You are left with layered stamps....


Time to start adding colour....
I used Art by Marlene Watercolours, in both Bold and Bright and Whimsy and Bright.
I layer upon layer the colours until I am happy with the depth and vibrancy.
I aslo sprayed water and allowed the drips to run down the page.


They are just a bit softer.


I also added some drips to her eyes.

I then went in with a fine pen to add some details.


I also added some pen work to a few of the flowers, just to add some highlights.


Finally a few flicks of paint!


Love those drippy flowers....
and I love the white space around it.
Helps the colours to pop.


Keep your entries rolling in.
We love to see how you drip, spray and spritz on your creations.

Much love 
xx


Friday, 3 July 2020

Mini Madness with Tam

Hi creatives

Tam here today to share my take on the 'Mini 'Madness.'
I love this challenge.....some  of you may have seen my 'minis' I created last year in an Art by Marlene Aquatober challenge.
A way to try out ideas and play before heading to your larger scale journals.
If you'd like to see this I did a Facebook LIVE on the Scrap Matrix Shares page.

I was so excited when Vicki sent me a tiny album to play with, and the fact that she made it was even better - what an awesome way to use up some of those papers we have in our stash.

If you'd like your own  little book, contact Vicki as she may do a class on creating these.
(She tells me they are easy)!!

Anyway I've rambled enough, let's take a look at my mini creations.
(I haven't done step by steps today.....there's just too many), so I'll include pics and let you know products used and I'm hoping this month to jump on and create a page live as an alternative.


All of these above creations used Dylusions Paints and Dina Wakley paints.
I used the following colours:


I also added some word stickers and a Jane Davenport Stamp set.


These ones were also created using the above Dylusions Paints and Dina Wakley paints but this time I used stamps by Art by Marlene.


I love how these mix and match...... just perfect for this size and so much attention to detail.

Well hopefully soon, I'll find time to pop in and create a  'live mini' over on our Scrap Matrix Shares page.

Until then get inspired by our current challenge.....


Upload your entry to our Shares page.
Just too easy!!

See you soon


Wednesday, 19 February 2020

Gel Printing Art Journal Page

Morning everyone, today I am sharing an art journal page that I have created using scraps of Gel prints that I had left over from my first project


I have used the Art by Marlene Art Journal - love the fact that you can remove the pages and work with the singularly.

I randomly placed the gel prints around the page and stuck down with Matte Medium.


Once dry I I have then used Paper Artsy Paints and JOFY Stencil PS139


I have made some more marks using an old papertowl roll covered with bubble wrap and paint


I have then stamped my image using Paper Artsy Stamp ETS29 designed by Tracy Scott (Love this stamp!)  I have then used Paper Artsy paint in white to push everything around the flowers to the background.

I have used a white Posca pen to go around the petals very roughly and added some splashing of white and Tango Paper Artsy paints.


A little black ink around the edges, random marks on the page with my Fudeball pen and some saying from 13Arts Word Sheets and my page is complete.


I hope that you have enjoyed this little process and have a go at this months challenge - Gel Printing and Mark Making


Til next time - happy crafting


Tuesday, 5 November 2019

Bloom with Grace.- Tanya Froud

Hi all Tanya Here..

Today I'm sharing a canvas I have created.

First up I painted a face and a background with Paper Artsy Fresco Paints and some TCW stencils.


Next I grabbed some old book paper and water color paper and painted rough circles in a mix off sizes, using Prima Watercolors. Once Dry I stamped some random bits and pieces using Carabelle Studio stamps. I then fussy cut the circles and then dug deep into the stash and found some long forgotten brads and stacked the circles largest to smallest and joined with a brad.

Next i stamped the scribble rose from a set of Art by Marlene and then doodled on it and fussy cut them out. I also stamped a Art Foamy Rose by Art by Marlene using the brayer and paint technique and cut them out.


I then did some paint drips behind where i though my flowers would go before building a flower crown.


So there she is and how she came to life!
I hope i have inspired you to join us in this months challenge..

Hugs x 


Saturday, 12 October 2019

Happy Tracy Scott weekend with Tam!!

Hi guys
Well we are in the midst of the much anticipated Tracy Scott weekend at Scrap Matrix!!
I have looked forward to this weekend for such a long time (since last time really!)
And today we are right in the middle of it!!!

Yesterday we began, with not one but two classes!
What a start to the weekend.....
Today we continue.

Amongst all this Tracy Mania, I am here to share a few Tracy projects....


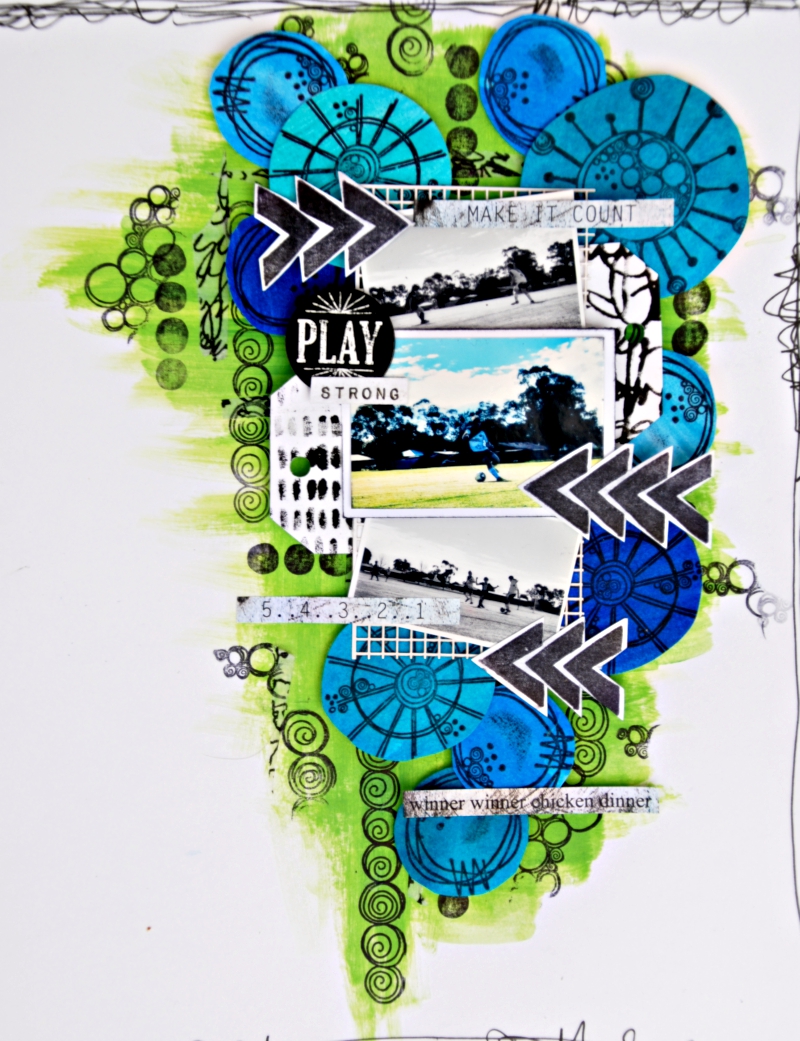
 First up a layout, celebrating soccer and stepsons....

Whenever I think of Tracy, I think of flowers, one of my big loves!
But I wanted to push myself to use some Tracy products to create a 'boyish' layout....


So I dug out all the stamps that weren't flowers......
 lots of  Tracy's sets have some boyish elements.
Here's what I gathered up..


These came from two sets. ETS125 and ETS01.

I immediately noticed all the circular shapes which reminded me of some recent soccer photos that I took of my stepsons match.
So I went with blue and green to highlight the colours in the photos (think grass and sky) and his team colours.

I began by adding green paint to the background, fairly haphazardly.
I used Dina Wakley  Lime and Evergreen 


Once dry I added some Dina Wakley washi tape and then stamped a few of the circular stamps onto the background.


I then wanted to add blue. 
So I painted a stack of different shades of blue onto some cardstock.
I used Dina Wakley paint in Lapis, Ocean, plus I used some of the gorgeous blues from Art by Marlenes watercolour set in 'Whimsy and Bright'.


I then stamped some of the larger circular shapes onto them.


Time to cut them out.


I then added my photos to the layout, and added these around the photos.


I added in a couple of handmade tags (created with art foamies and paint).
I also added in some 7Dots word stickers and a Mambi Chip.

Finally I stamped the chevron arrow onto cardstock (from set ETS125) and cut them out,
adding them to the layout.


The final step was to add a border and a few scribbles using my Fudeball pen.


Ok onto my next creation....
a quick art journal page.


I used Tracy's Mandala stencil PS124 and stamp set ETS01 again and  ETS09.


I began by adding white gesso to my art journal, and then I added blue and lime paint to the background using the recycled packaging method.

Basically add a bit of paint, lots of water and then splodge it onto your background.
I used Paper Artsy Beach Hut and Sargasso.


I really love the effect of this.
I also added a few blobs with a paint brush and then sprayed with water, and let it run down the page.
This helps to create the drippy look.


I then added the stencil to the page, and using dry baby wipes, I rubbed paint through the stencil.

I then added some Tracy stamps to create my dreamcatcher tail, and joined them to the stencil with my fudeball pen.


I then added paint to the stamped images.

I also added a rough border and scribbles with my fudeball pen.
Finally a sticker from the Art by Marlene sticker pack and that's it!


This one really was super quick.

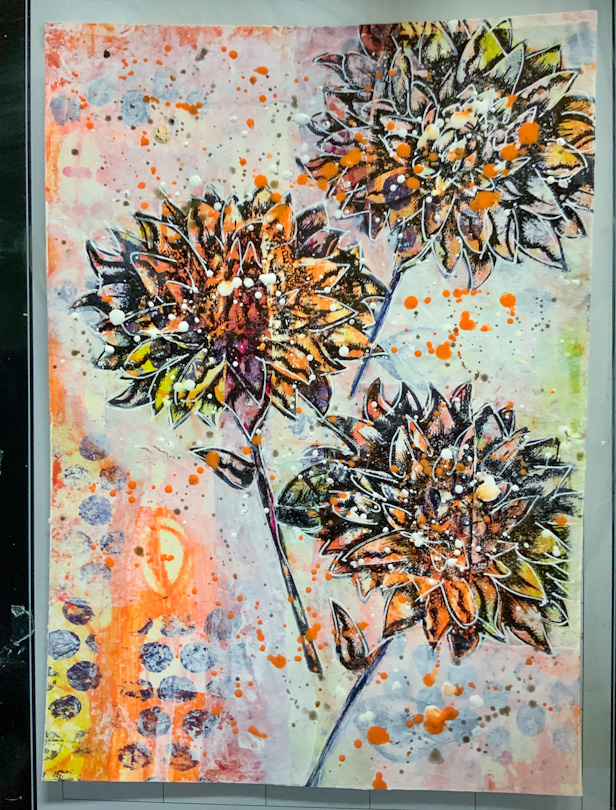
Ok, now this last piece, I wasn't going to share and I don't have many photos because it was a complete FAIL!!!!
So much so, that I walked away and went and did something else.
Then a few days later, I came back to it and felt like I had nothing to lose, so I'd just play and see what happened.

To my surprise I ended up loving it.
It was a frustrating process, but when it did happen - the moment it changed - well that was magic!!

So my point is don't discard, keep adding layers, keep experimenting.
You never know what's around the corner.

PLUS sometimes that mistake is a creative gift.  
You see you no longer care about what you are doing.
You have nothing to lose.
You can't stuff it up anymore than it is.
So there's an opportunity to NOT think, to not judge, to just play, to follow your intuition and just see what happens.
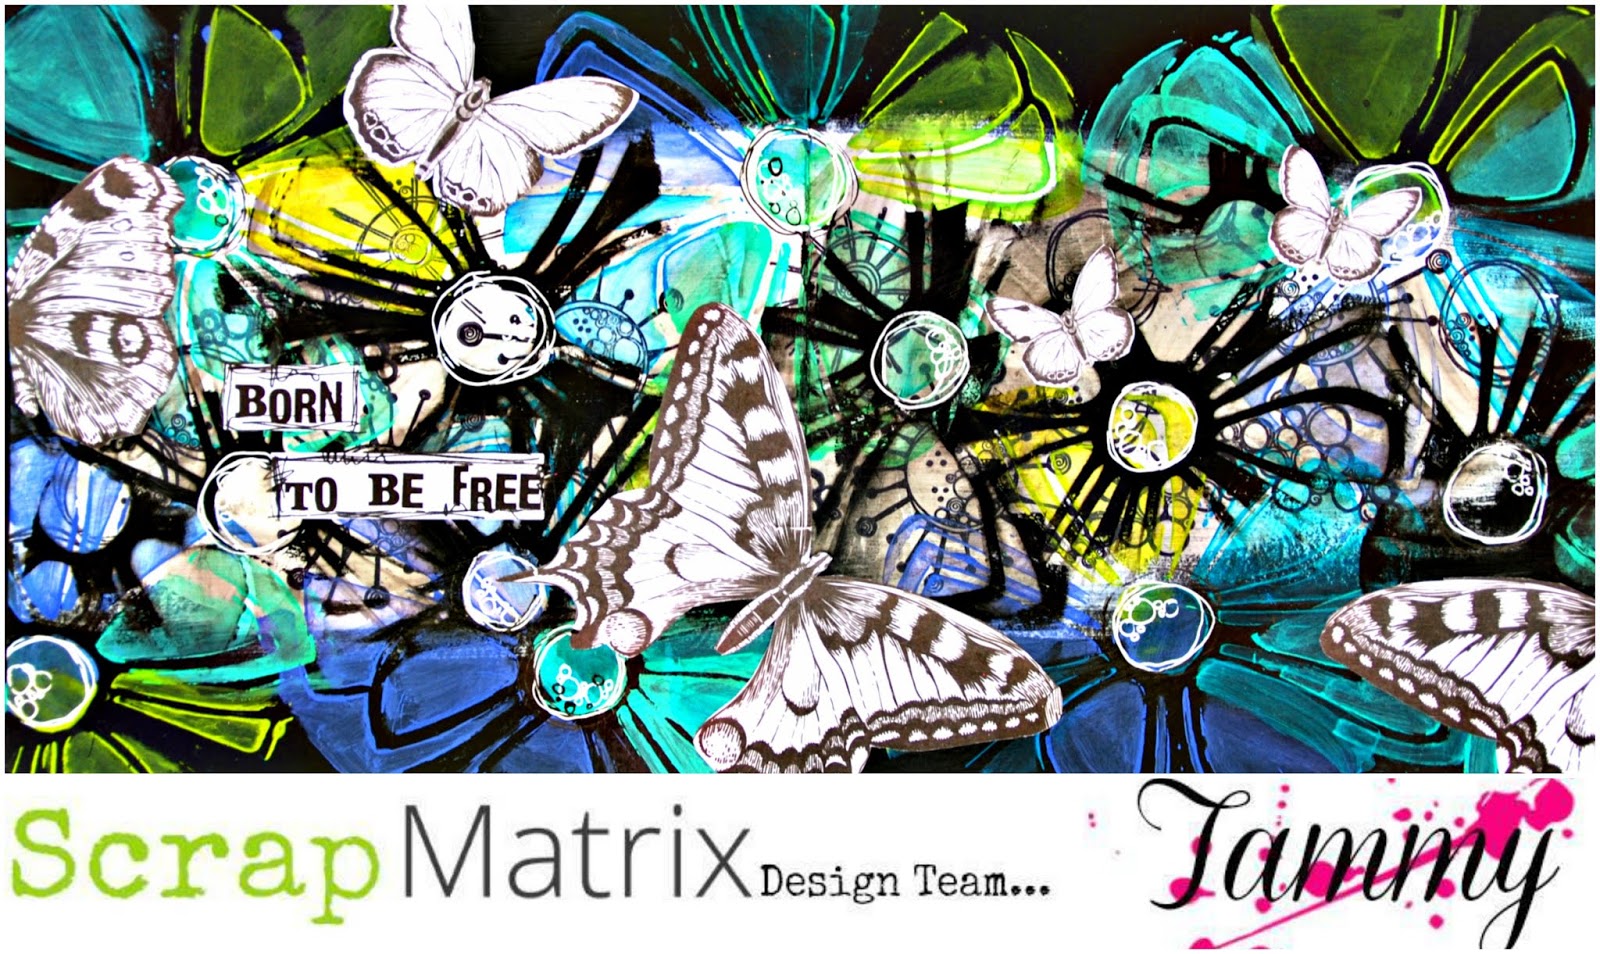
That, my friend, is true ART, true freedom....


Yep very aptly titled!!


Those butterflies were cut from an adult colouring book, as they remind me so much of  Tracy and some of her beautiful butterfly Stamps.
I haven't yet treated myself to those gorgeous stamps of hers but you will find them here.
ETS26.  (this may change tomorrow, lol)


I adhered them to the page with Matte Gel.


Sorry I don't have step by steps to show you but this time its more about the exercise, about just letting go, about finding that freedom.

I know I have rambled a bit today, but I'm blaming excitement and anticipation.
I've gotta go get ready for today's Tracy classes.....

Much love...
Tam
xxx

Paper Artsy Paint - Beach Hut, Slimed, Sargasso, Cerise, Banana, Lavender
Dina Wakley Paint - Black, Lime, Evergreen, Ocean
Mambi Chips