Showing posts with label cards. Show all posts

Wednesday, 8 July 2020

Mini Madness for Scrap Matrix. .... Lynn

Hi everyone, Lynn here with my take on this months challenge - and I had a big mental stumbling block on this one that I will explain later on!!

I have done some little cards and tags


I had no idea what to create (My mojo was on holiday I think!). So i thought lets just put some colour down and see what happens.

I thought back to my class with Tracy Scott and did just that with my finger and Paper Artsy Paints


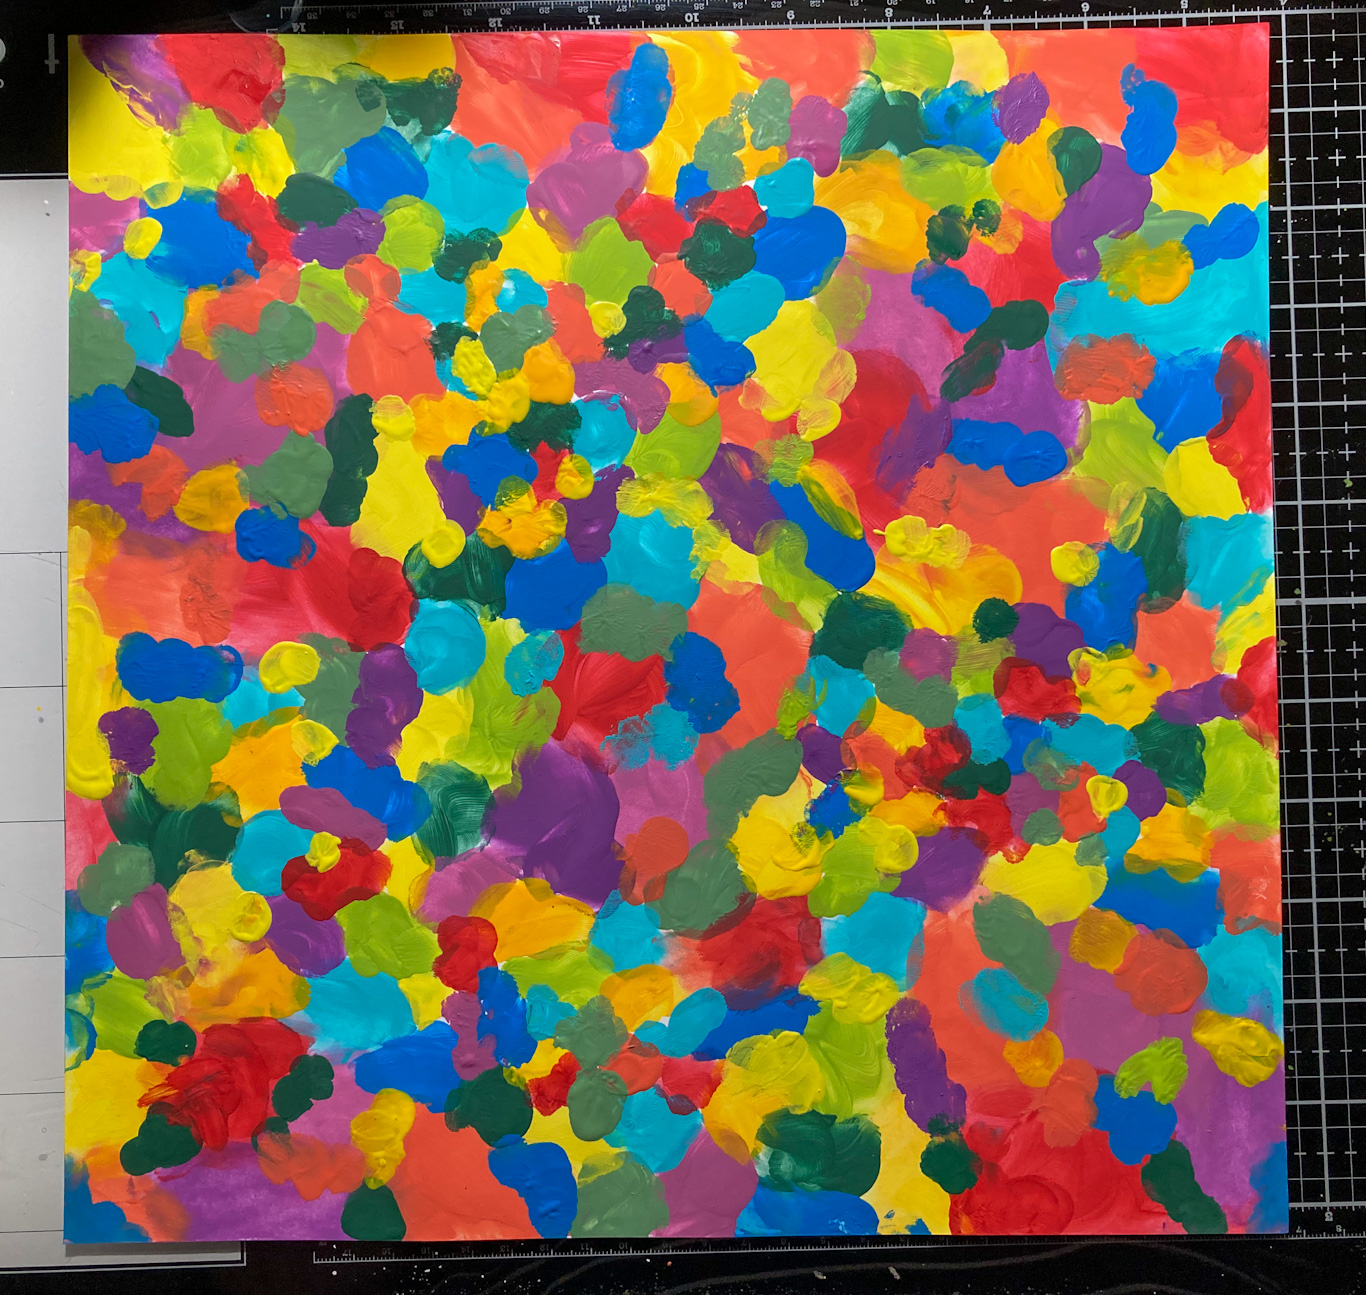
This is the point where it is "ugly" and you need to work through it.  So I start to apply stamps from Tracy Scotts ETS33 and ETS35 sets


No method at all just anywhere.  I then used Paper Artsy Paint - Little Black Dress and blocked out the areas around the stamps. 


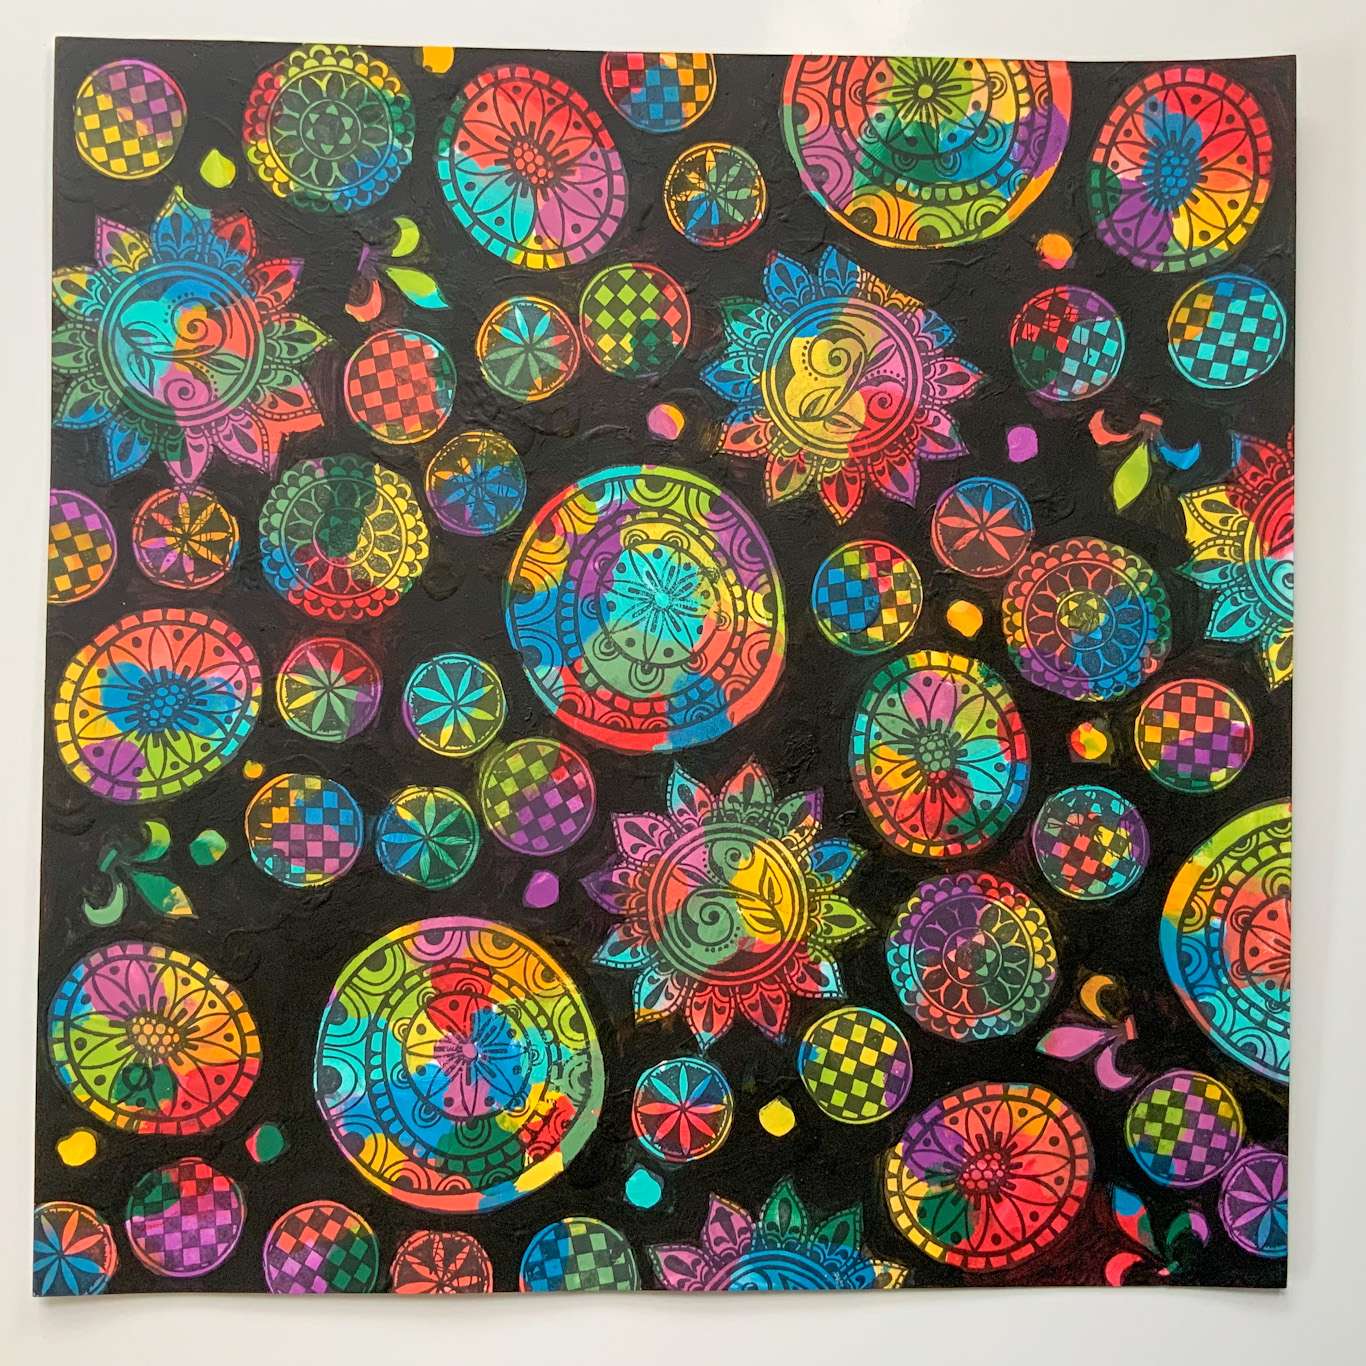
Starting to like the page a little more at this point - but White Pen is needed:


Loved this but still lacking the lift I was looking for so back to the white pen again - excuse the photos, those that know me know I am only able create at night and not the best photos.


And then I got to the point of - I cant cut this up I love it too much, but it is so busy what am I going to do with it?

So here was my mental stumbling block.  I spent a couple of day just looking at it before take the plunge and putting it in the guillotine!!!   

I cut it into small squares for gift tags and rectangles for cards.  I have backed them with cardstock and added some Tim Holtz Small talk stickers to them.


I had some pieces left over so thought I would put them in my art journal page to complete later.
I painted the page with fluorescent orange paint and added the squares and a couple of flip covers to put photos and journalling.


Products Used:


I hope that I have inspired you to have a go this month - here is the moodboard for inspiration


Once you have created your project - just upload to the Scrap Matrix Shares page on Facebook.

Til next time

Lynn Good

Thursday, 18 June 2020

Jen's paper hugs.

Hi Everyone!

It’s my turn again and today I’m sharing a few cards.

 At the moment with social distancing we are finding it a little difficult to catch up with friends and family. So I thought I would make some paper hugs. I get a thrill every time I collect the mail and there’s a card for me.  It’s just a pity it’s only at Christmas and birthdays, or sadly when you lose someone.   I read recently somewhere about some primary schools that are sending cards and letters to aged care homes so that the residents don’t feel so isolated.  I thought this was a great idea, my niece and nephew did not. Oh well, sorry grandparents, I did try.

Back to my cards…

I started by playing with Paperartsy’s Fresco Acrylic paints, my gel plate and a few stencils and stamps.  This is very addictive.  I wait for a gloomy, wet day to do this, so the paint doesn't dry too quickly for me.  (There have been a few too many days like this lately.  That's the price you pay for living in the wettest part of Australia.)


 I picked out my three favourites for the card backgrounds. Then with some gel medium, I glued on some torn printed tissuepaper and book pages.


Next, I rummaged through my stash of Paperartsy stamps and grabbed the crosses from JOFY53, little squares from ETS12, and dots from EKD02. I stamped these randomly with Archival Inks. One card I sponged some Snowflake Paperartsy paint through a 7Dots Studio stencil just to give it a bit more character.  I attached these to card bases.


My next step was my little houses.  I used the CarabelleStudio stamps "Our Street" and stamped them onto my other gel-printed papers with Jet Black Archival Ink.  I cut out the individual houses and roofs/rooves(??) and arranged them to my liking.


I attached them to my cards using glue tape and 3D foam.   The sentiment came from my stash and was just stamped onto white cardstock with Jet Black Archival Ink and attached with glue tape. 


There they are.  All ready to send happy wishes and a warm hug to someone. So why not brighten someone’s day with a paper hug. 

Make sure you share it on the Scrap Matrix Share page on Facebook in the appropriate album.  You will be in the draw for a prize.  Just make sure you mention which Scrap Matrix products you have used.


 I think the sun is trying to peek through the clouds.  Finally.

So bye for now.

JEN.

>^.^<

Sunday, 10 May 2020

Zesty Cards

Hi Everyone! 

I'm hoping the day is treating you well.
Today I'd like to share my first project for the month. 
I've made three cards which I hope will brighten your day.


I have to admit these were not the first thing that came to mind when I saw this month's challenge. 
All I could think of was how fresh and clean citrus colours were, 
then I thought of refreshing cool drinks and cocktails.  
This could be because Autumn took its sweet time arriving up here and I was feeling a little warm. 
So because I was unable to come up with a way to draw Fluffy Ducks, Grasshoppers, Tequila Sunrises and Margaritas, (I may be showing my age here), we now have three cards. 


First I grabbed my Distress Inks in Squeezed Lemonade, Carved Pumpkin, Ripe Persimmon, Worn Lipstick (does anyone else think of Barbara Cartland when they use this colour? No, it's just me.), Twisted Citron and Mowed Lawn. 
Using an Ink Blending Tool, I applied my chosen colours diagonally across a piece of white cardstock roughly about 14.5cm x 10.5cm in size.
I then repeat this but I blend over the previous colour a little so that there is no clear line between each colour.   Next I wet my fingers with water and 'flick' it over the cardstock.  I usually place some paper towel over it to soak up the water after a few seconds.  (This is not necessary given the shortage of paper towels at the moment. When will this madness end!)
  Tip:  Have a piece of scrap paper handy.  Place it on the sections you have already blended.  This stops any fingerprints being left behind. 


I grabbed my Carabelle Studios stamps and chose the Happy Poppies, the Leafs and the Blooms and Circles Elements sets as well as a script stamp from my stash.
  I stamped the Blooms and Circles Elements and script stamp randomly over the card in coordinating colours from the Archival Inks range, (but I've forgotten which ones), and my focal stamps in Jet Black Archival Ink.


 On a separate piece of white cardstock I stamped my focal images again and cut them out.
  Tip: I always go around the edges of my fussy cutting with a dark grey pen.  This hides any mistakes. 
Next I used my Ink Blending Tool to go around the edges of the cardstock in the same colours.


I finished my cards by attaching them to a card base and a Tim Holtz sticker for a sentiment. 

I also coloured a few of the smaller features of the stamps (that were too small to cut out) with a white pencil and flicked some white paint over them just for some added interest.


Well, there you go.  Another project done. 
It's really gloomy here today and these cards really brighten up my table.
  If the current circumstances are making you feel a little gloomy, I fully recommend popping into your craft room and grabbing some citrus colours.  You'll be right in no time.
 Don't forget to post your projects on the Scrap Matrix Shares page for your chance to win a prize.

 Jen 
>^.^< 


Saturday, 18 January 2020

Summer Blooms


Hi!
  Today I've got three cards for you using the Colours of Summer theme.


Summer seems to be filled with birthdays to me.  
A lot of my favourite people seem to be born during these months. 
I'm constantly making cards, (and attending celebrations), so I thought I make some using the bright colours from Ranger's Distress Inks and Paperartsy's JOFY large blooms.

So this is what I used:

Card Blanks
White Cardstock
Paperartsy Stamps - JOFY 71, JOFY 72, JOFY 73 
Distress Inks (DI) - Twisted Citron, Mowed Lawn, Salty Ocean, Ripe Persimmon, Mustard Seed, Squeezed Lemonade
Archival Ink - Jet Black, Library Green
Coloured Pencils

Firstly I blended my DI inks onto the cardstock then stamped my chosen designs with Jet Black. (Of course I forgot to take photos of this step.)  I added details with my pencils and the Posca pen and black pen.


I next chose my two favourite DI greens and blended these onto another piece of cardstock. Grabbing the stencil, I blended Salty Ocean over it .  I stamped one design in Library Green randomly over the cardstock.  I stamped the second design with embossing ink and covered it with embossing powder. Heated it with a heat gun to set it.


I trimmed the paper into several sizes and attached them to the card blanks.   I used a black pen to trace around the pieces to add some definition.  I cut out my petals and centres and glued them to the cards, (using 3D foam for the centres).


So that's it.  Three simple cards for Summer.  I hope you all get to spend some time in your craft rooms.  It's a great way to relax. 
I'm off to another celebration.  I hope they like the card I made. 😄


Monday, 18 November 2019

Joyful Blooms

Welcome everyone!

 I hope your day is going well and that it is full of sunshine and laughter. (Unless you need rain, then I hope you get enough to brighten your day).


I have three cards to share with you today.  It’s not what I had originally planned, though. I had a disastrous attempt at a project and ruined a sheet of 7 dots paper before I decided to stick to what I know best.  Being a guest on this blog has pushed me to try and do better and to try new things, but this time my hubris got the better of me. Oh well, back to my cards. 


Once again I’ve used Paperartsy Stamps, this time from the JOFY collection.  I love Jo’s whimsical blooms. They make me smile and fill me with joy.  So maybe my cards can bring you a little bit of happiness.  Here’s what you will need: 

·         White and black cardstock.
·        7 Dots paper – I’ve used Epilogue from the writer’s Block collection
·     Distress Ink – Peacock Feathers, Picked Raspberry, Mowed Lawn,
 Hickory Smoke, Salty Ocean and Twisted Citron
·         Archival Ink – Jet Black
·         Lindy’s Stamp Gang spray – Clam Bake Beige
·         Clear Gesso or Gel Medium
·         Modelling Paste
·         13 Arts stencil – Aria Song
·         Paperartsy stencils – 154, 155, 156
·         Paperartsy stamps – JOFY 73, 74, 76, 82
·         Pencils to colour and highlight (optional)
·         Posca pen – white
·         Sequins, (optional)

Step 1.  Blend inks randomly over cardstock using Peacock Feathers, Picked Raspberry and Mowed Lawn.  Then using your craft mat/piece of packaging/acetate stamp each ink pad and spray a little water on them. Smoosh ink onto coloured card. (You may have noticed I love this technique.)  Using Lindy’s spray, flick some ink over the card.


Step 2.  Stamp your chosen designs with Jet Black and cut them out.  (I wasn’t sure at this stage what I was going to use so there are a few left over.)  I also stamped some onto a blank card and coloured them with pencils. There are a couple of stamps where it is possible to cut out sections and layer the blooms.  I’ve done this where there is text.

Step 3.  Cover the sheet of 7 Dots paper with Clear Gesso. Let dry. Stamp Salty Ocean onto craft mat, spray with water. Using a brush, paint it randomly over the page. Lightly mist with water. Dry with heat gun.  Repeat with Twisted Citroen.  Grab your desired stencils and using Hickory Smoke place them randomly across the page. When you are happy with the result cut them to size. (I’ve used 13.5cm cards. So I cut them to 12.5cm).


Step 4.  Stamp the circles stamp from JOFY 73 with Hickory Smoke randomly around the edges.  Using the 13 arts stencil, I’ve used modelling paste randomly over each card. Let dry.

Step 5.    Using Distress Inks I’ve stamped foliage stamps from each set onto the cards. Also with Jet Black I’ve stamped the flowers from JOFY 82 so I didn’t have to cut out the stems and stamens. I’ve then attached my cut out flowers using either glue or 3D foam. I’ve also blended the inks around the edges of each card.

Step 5.  Add highlights with Posca pen and glue sequins .Attach to black card and the card bases. Attach sentiments with 3D foam.


I don’t think I’ve forgotten anything, so pop on the kettle and hop into your craft room. 

Happy crafting.
Jen.